> ## Documentation Index
> Fetch the complete documentation index at: https://docs.talview.com/llms.txt
> Use this file to discover all available pages before exploring further.
# Moodle 4.5 LMS - Installation Guide (Moodle Plugin Integration)
## Introduction
Talview's Proview proctoring solution for Moodle 4.5 LMS is delivered through a single plugin that integrates advanced proctoring features directly into Moodle's quiz module. The plugin enables subject coordinators to configure proctoring settings for quizzes, enforce secure browser environments, and review session recordings — all from within Moodle.
> **Note:** The plugin is free to download, but a subscription is required to fully use it. For subscription enquiries, contact the [Talview Sales Team](https://www.talview.com/contact) or reach out to [Talview Tech Support](https://talview.freshdesk.com/en/support/home).
***
## Prerequisites
Before proceeding with the installation, ensure the following:
* You have administrator access to your Moodle 4.5 LMS instance.
* You have your Talview-provided **admin username**, **admin password**, **account name**, and **root directory** details on hand.
* **Moodle Web Service URL**
* **Moodle Web Service Token (wstoken)**
* This token is generated by the Moodle admin.
* It will be used to authenticate Proview’s requests to Moodle.
***
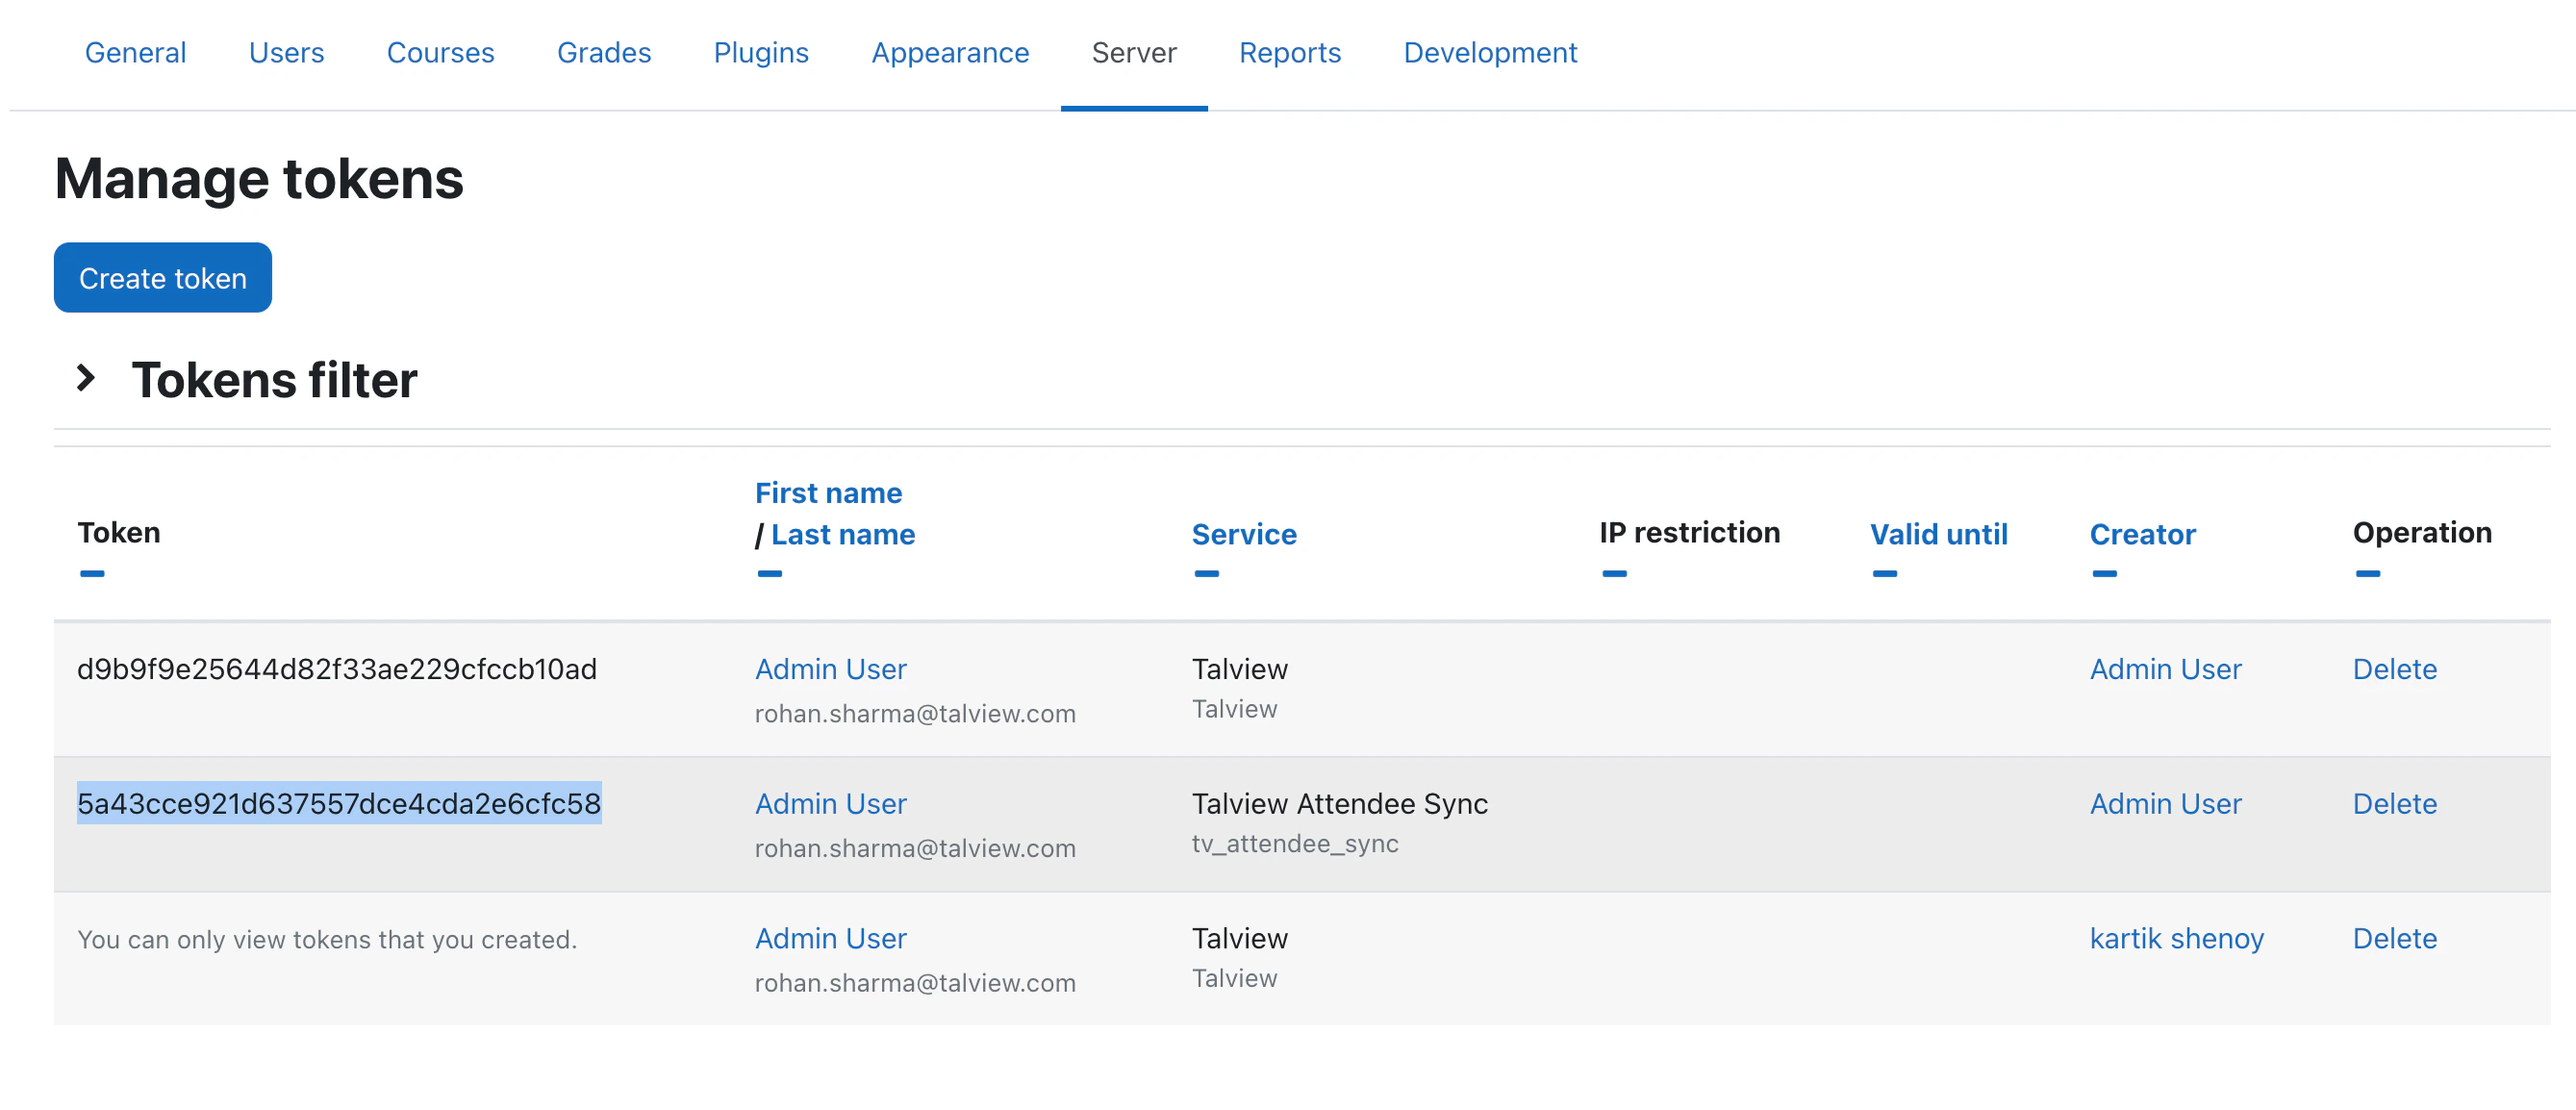
### Steps to create WSToken
* Navigate to Server (Tab) > Web Services > Manage tokens
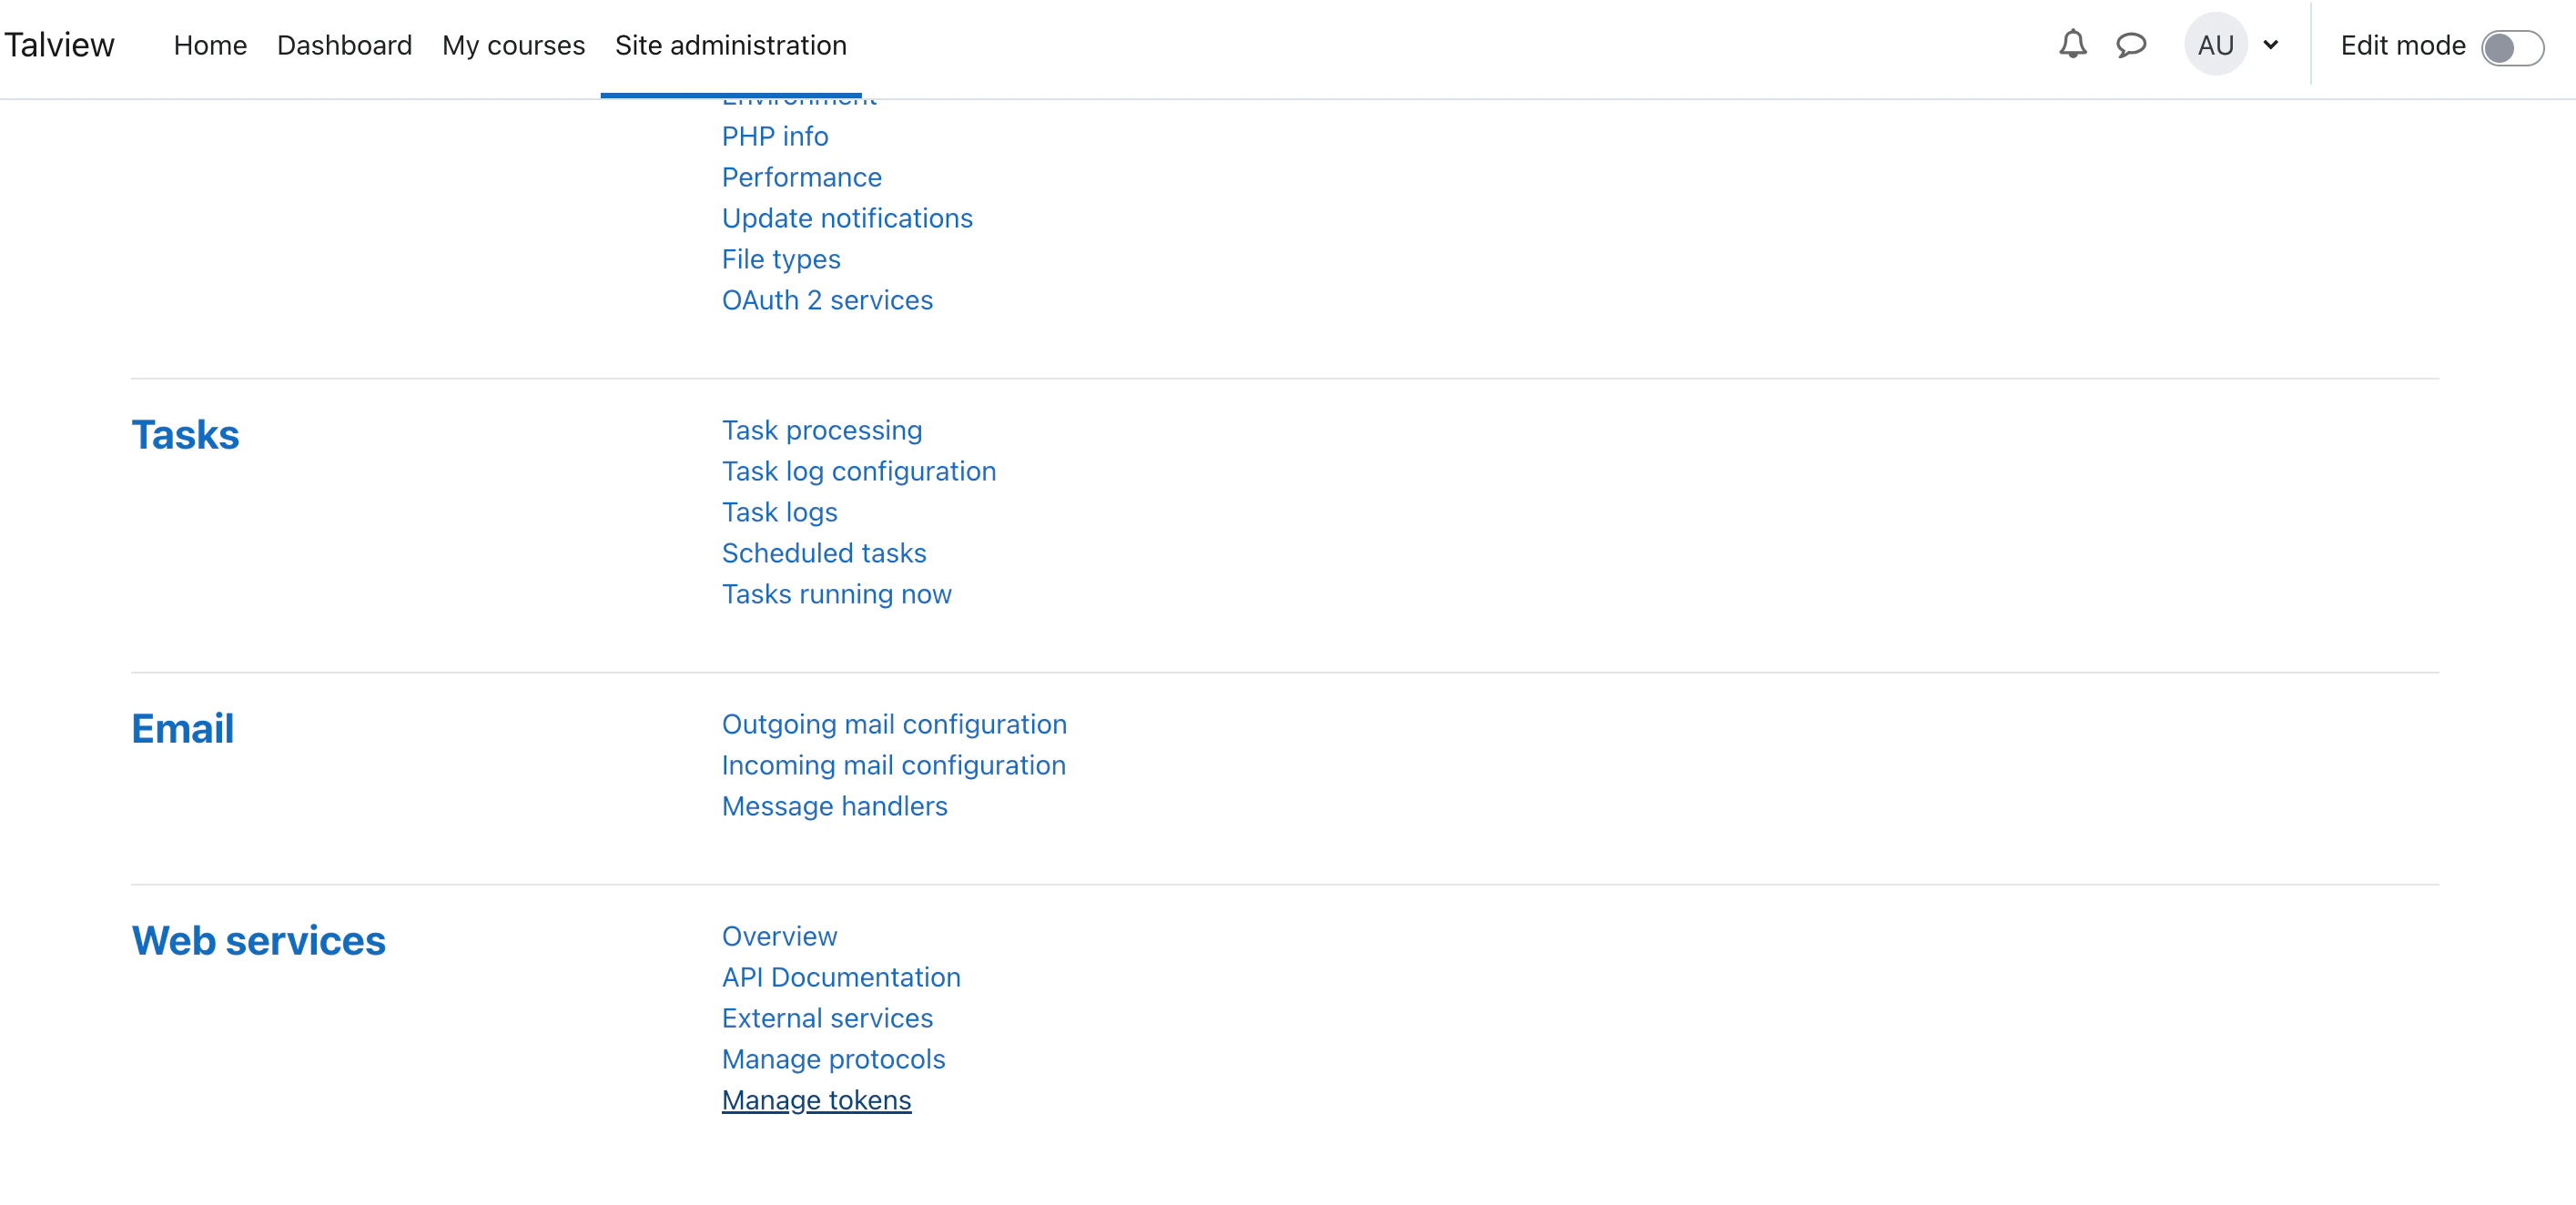 * Click on “Create token” button
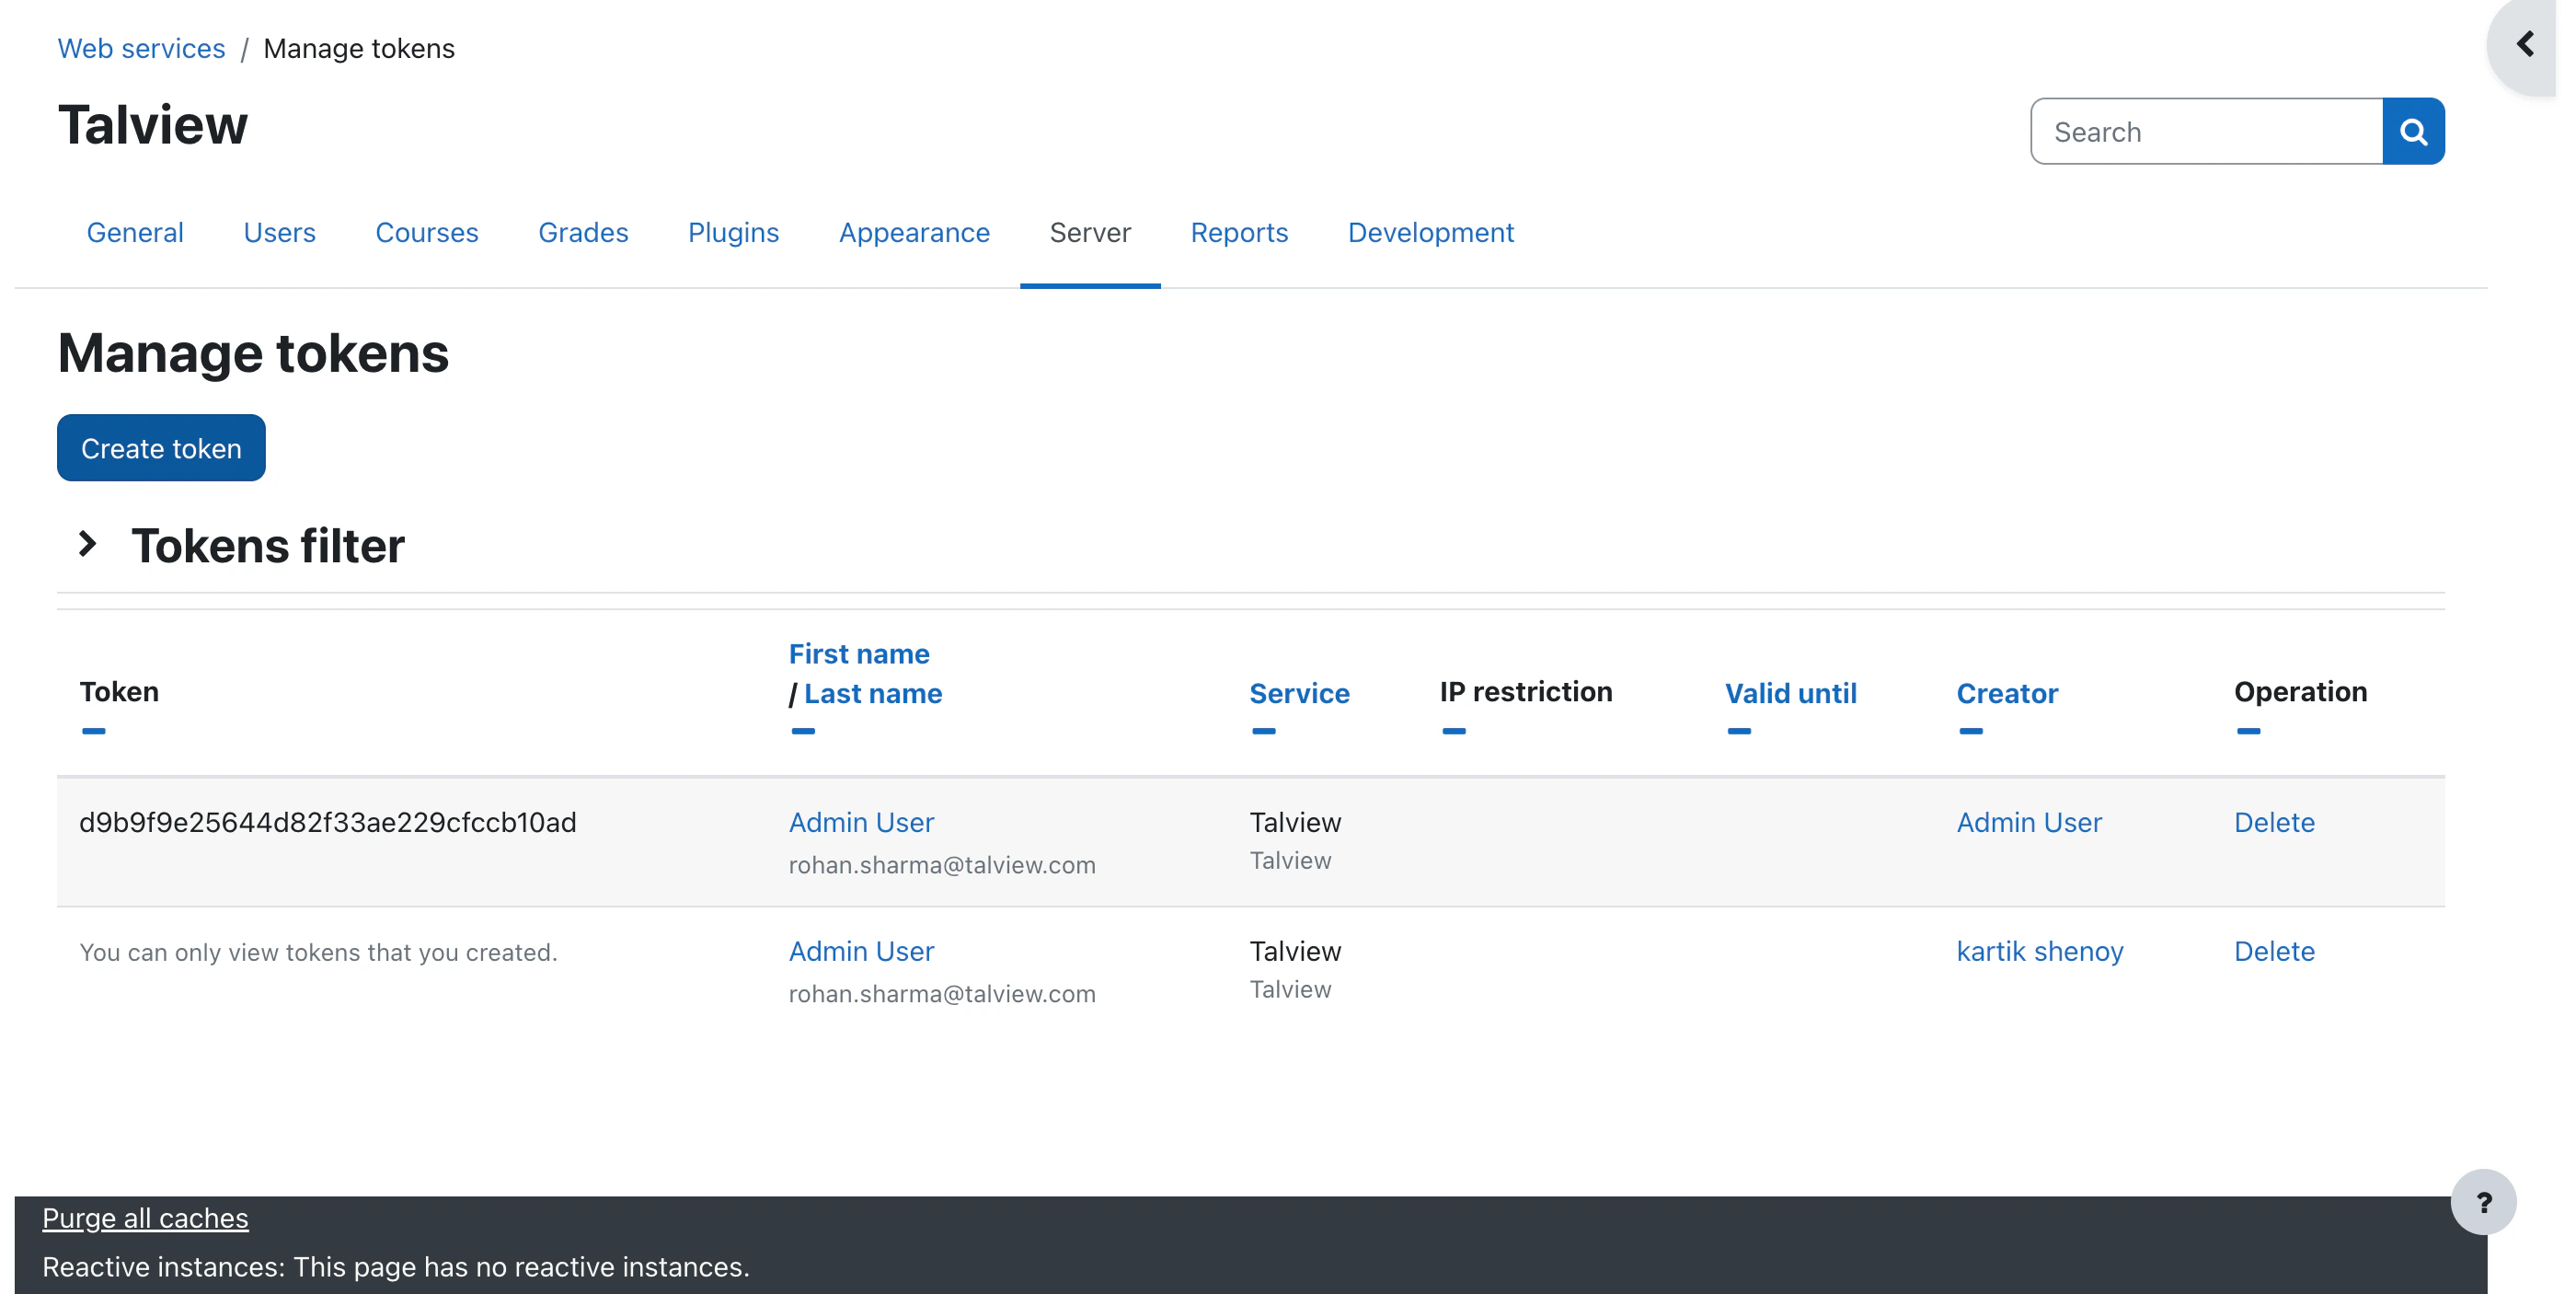 * Select user who have admin access and select service that we created earlier.
* Access “Server” tab
* Select user who have admin access and select service that we created earlier.
* Access “Server” tab
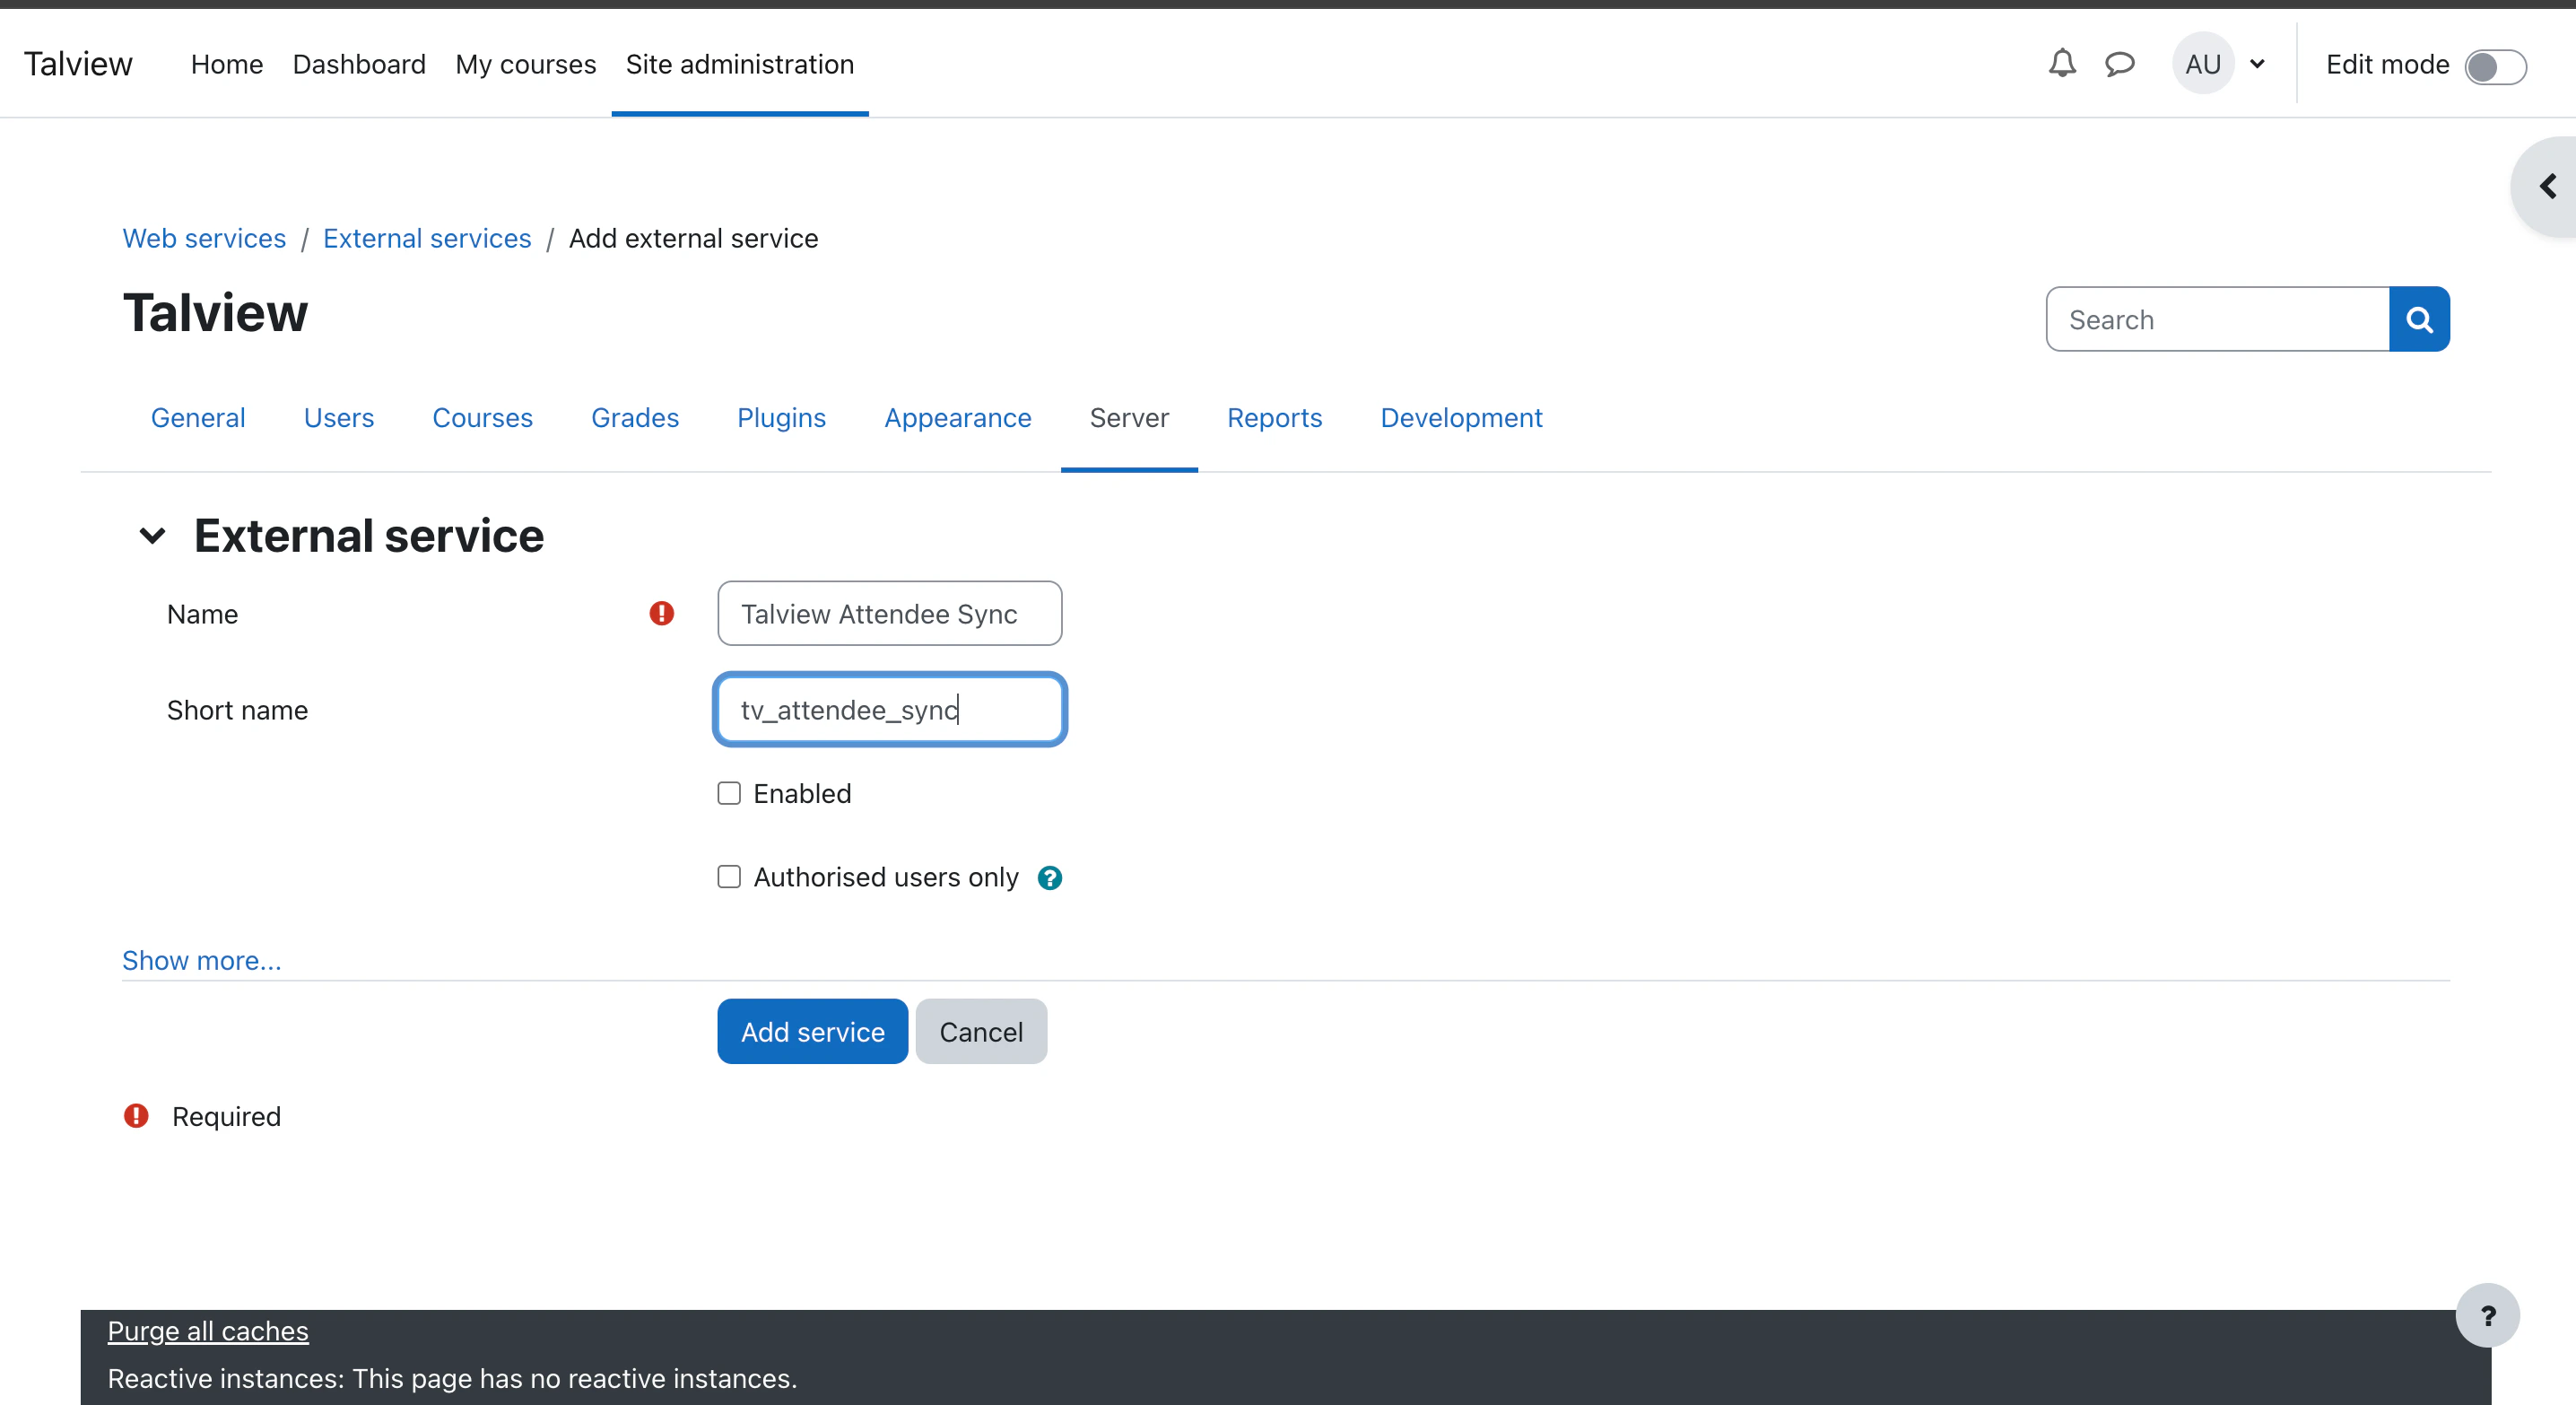
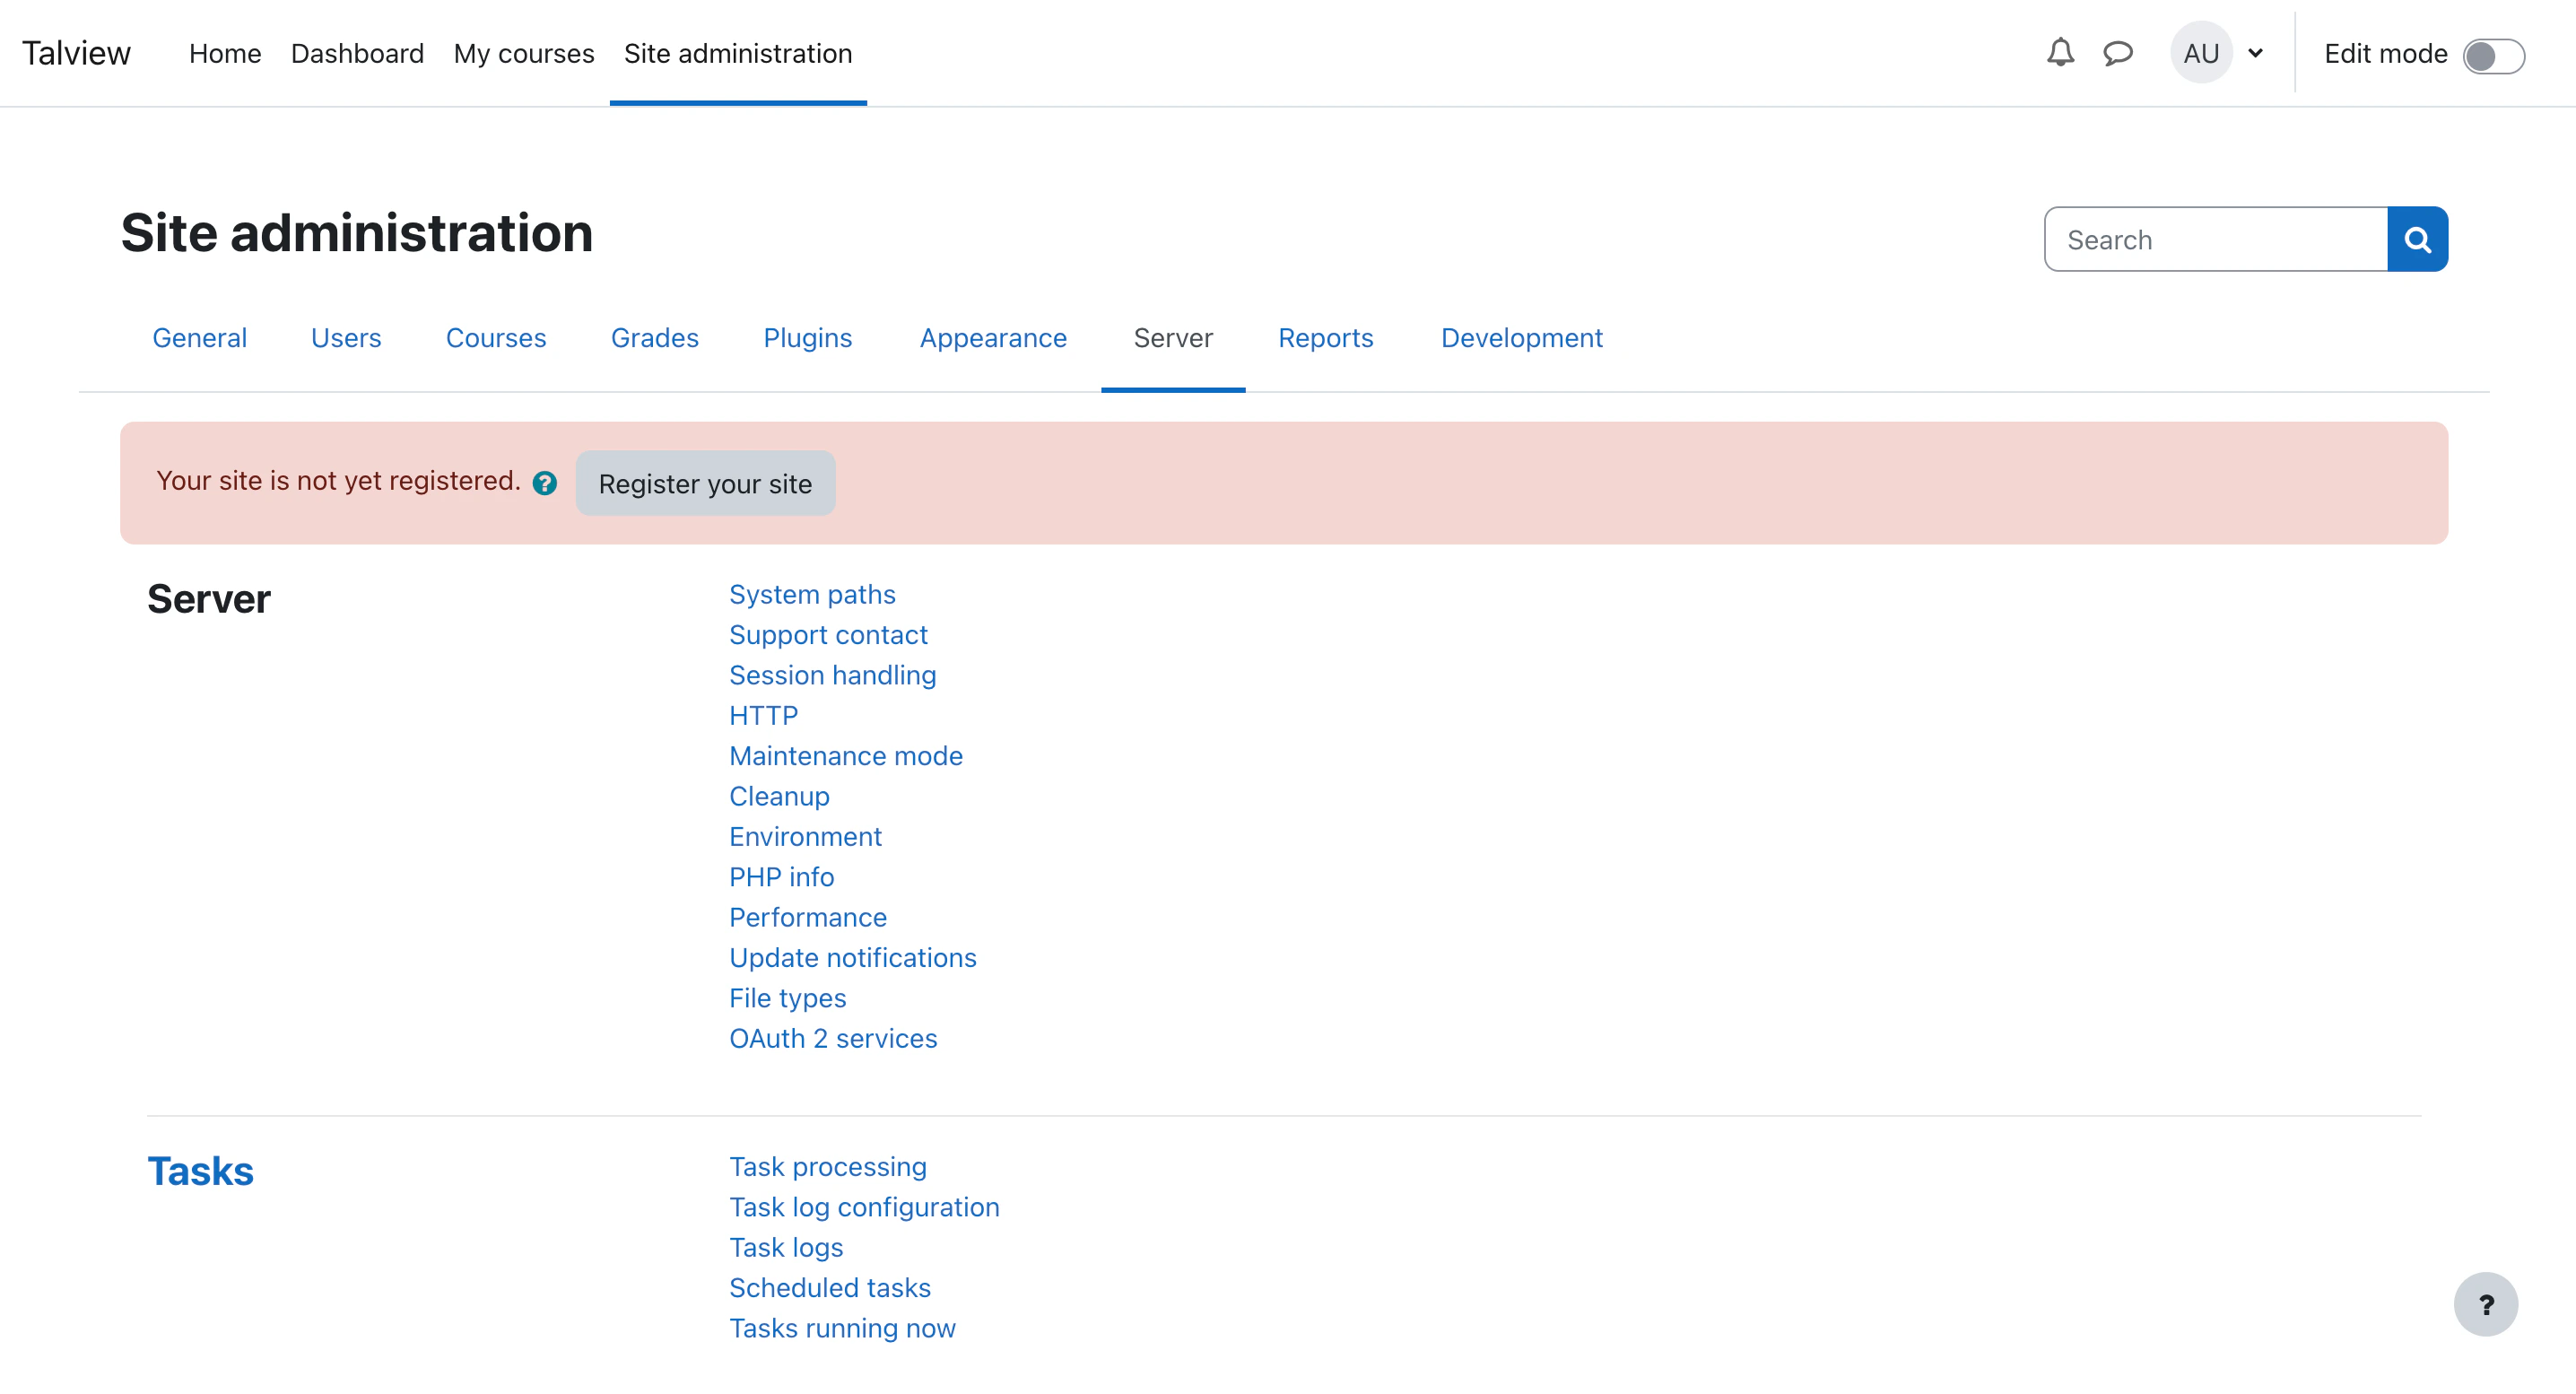 * Navigate to “Web Services” and select “External Services”
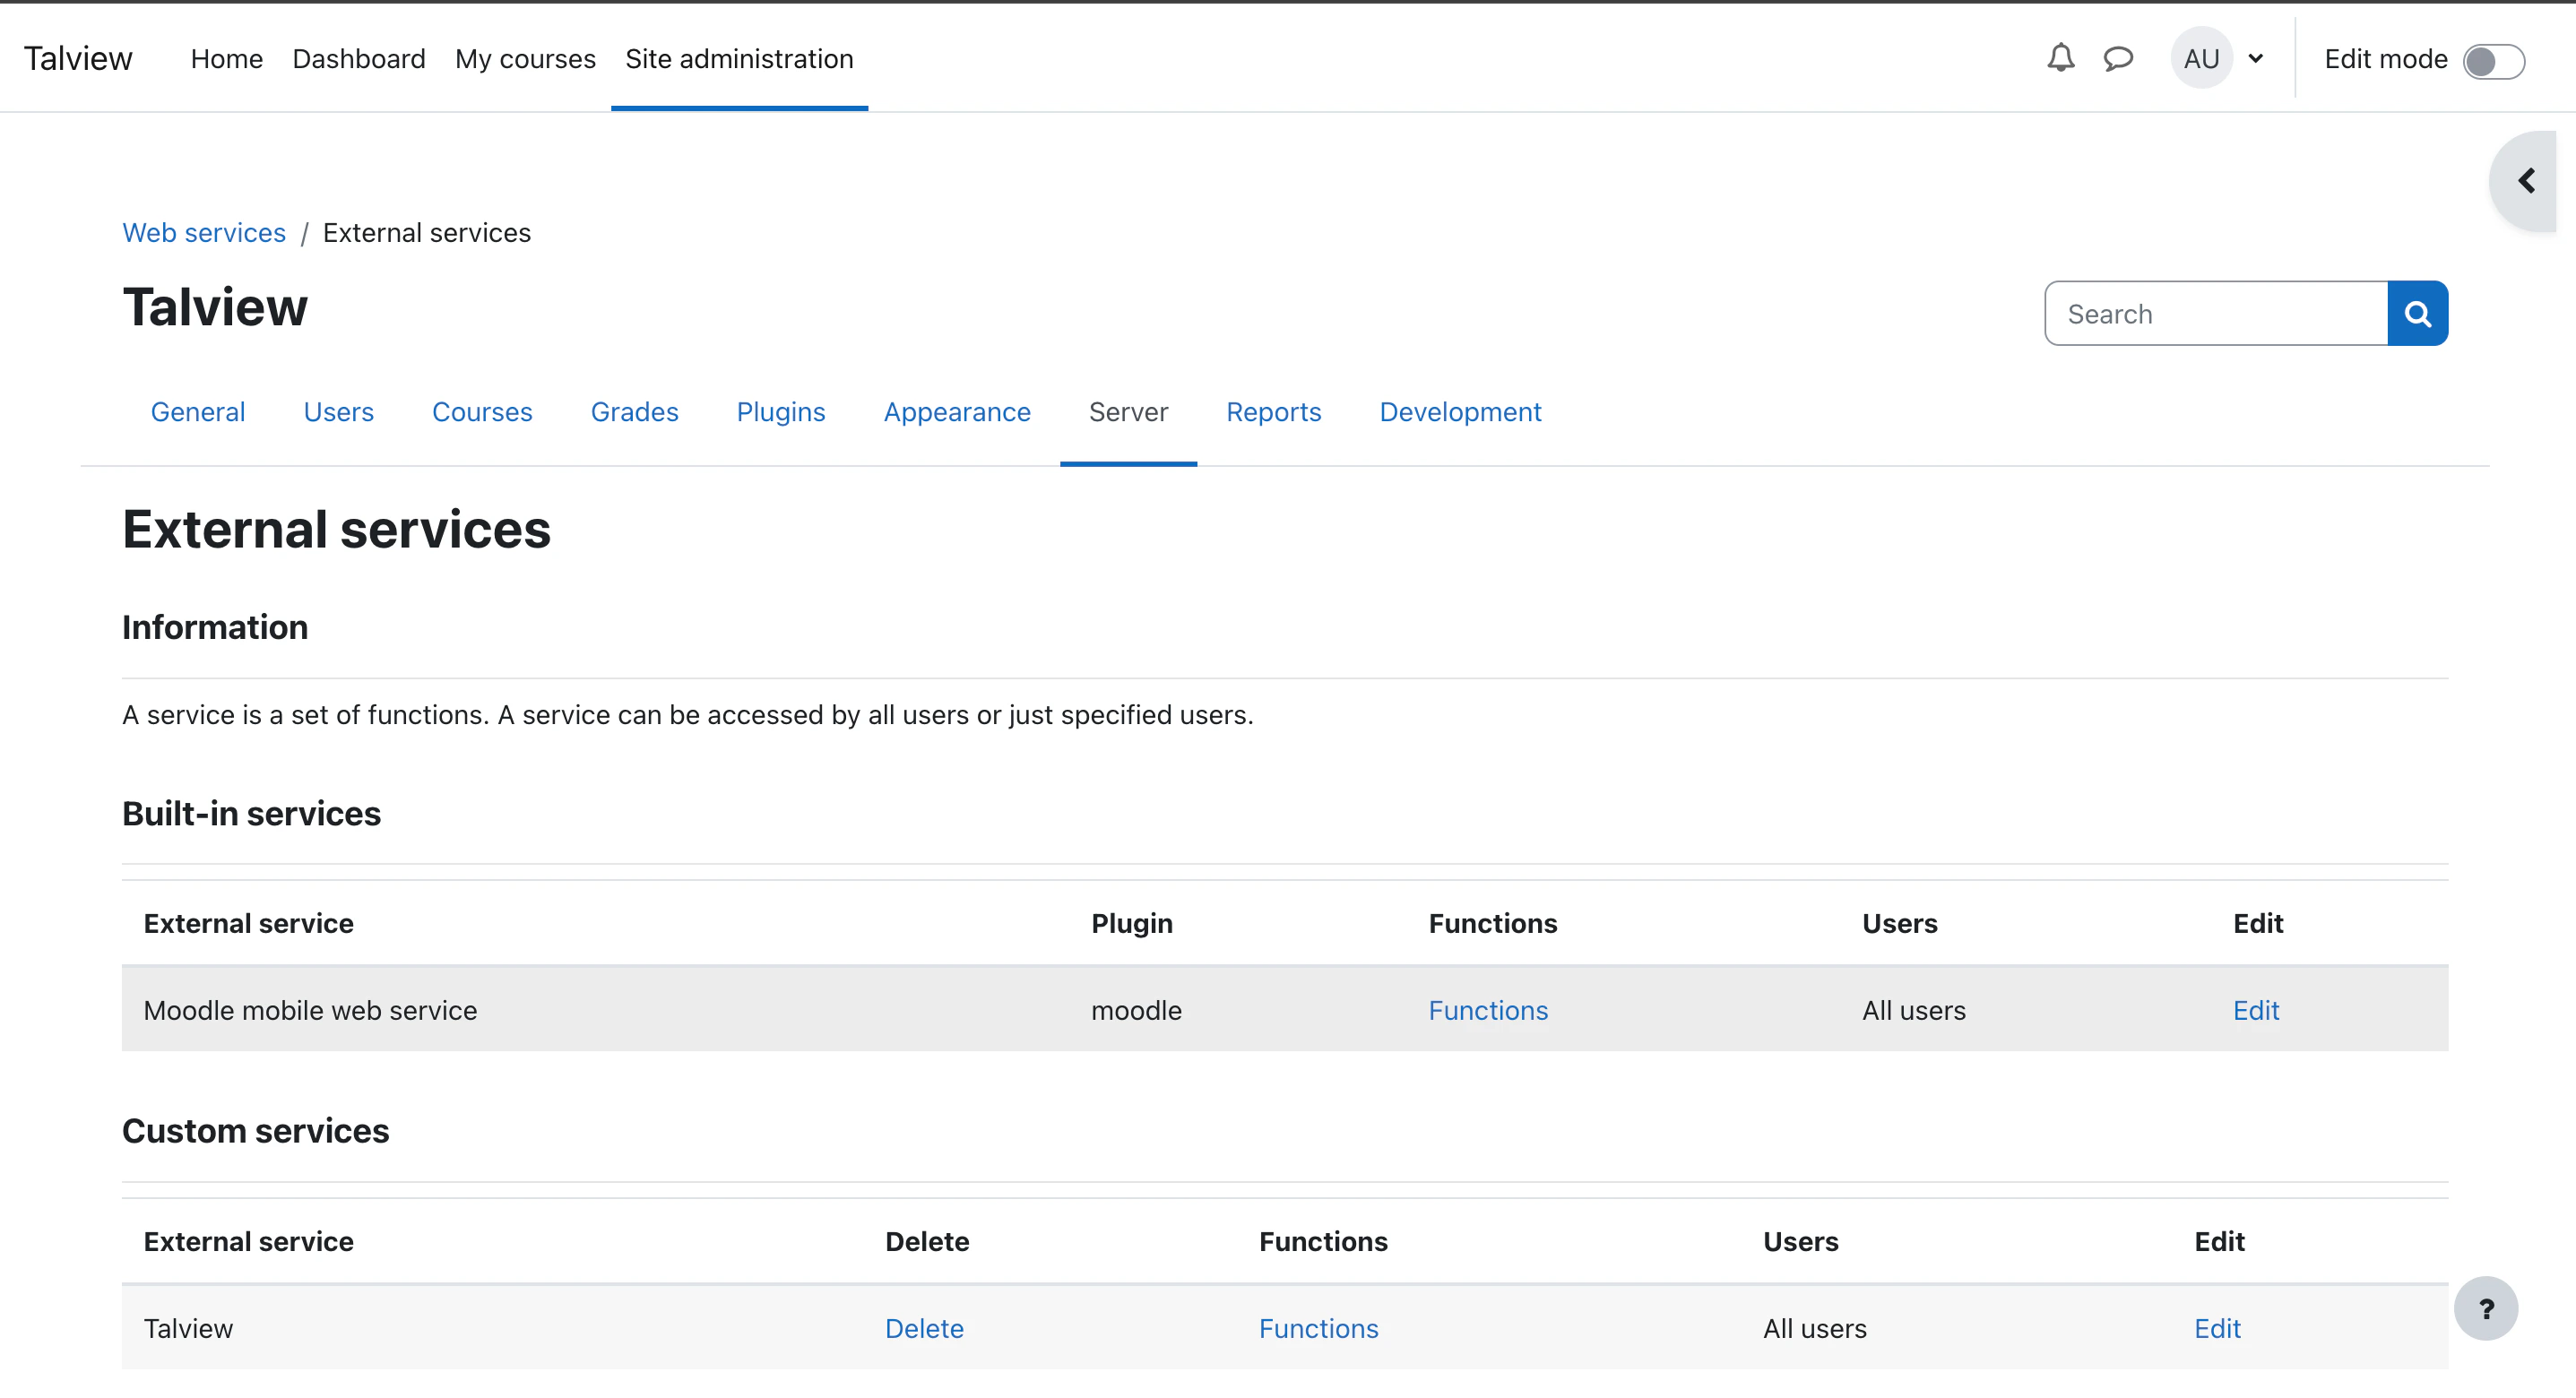 * Click on “Add” service to provide name and short name.
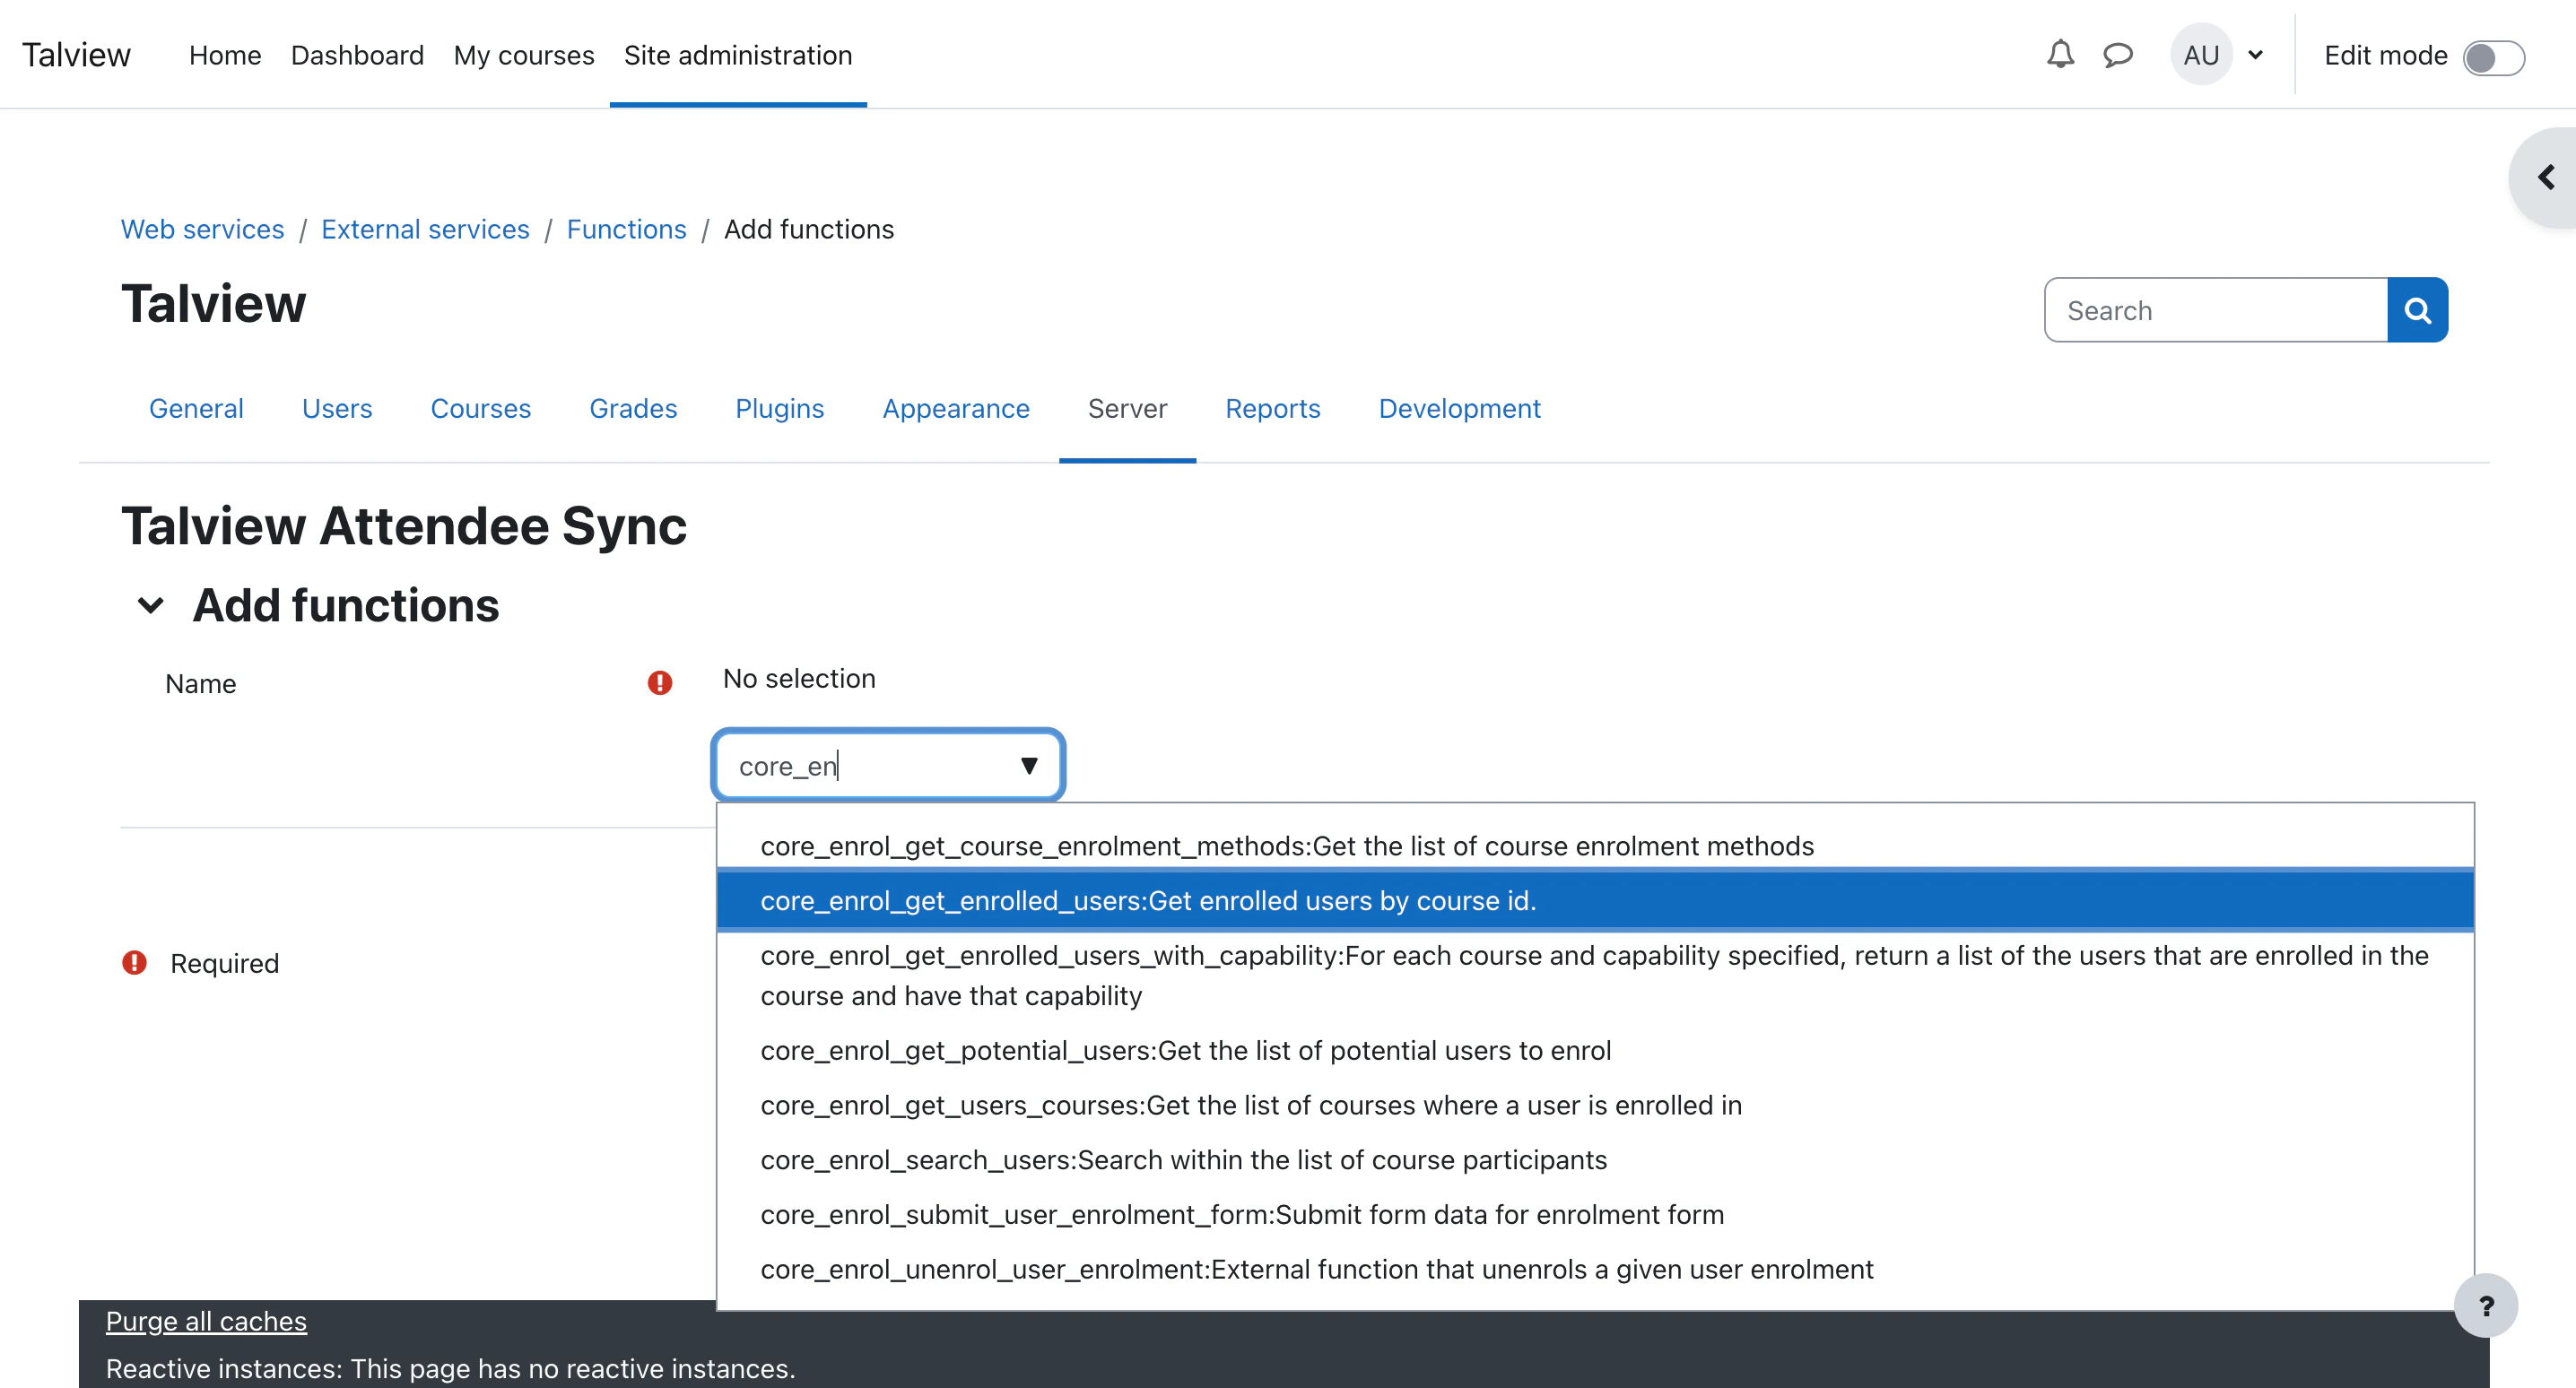
 * Upon clicking the “Add Service”, it will prompt to add function. click on “Add Function”
  * Search the function name `core_enrol_get_enrolled_users` and select it
 * Upon adding the screen will look something like
 * Once the service is created, select it from the dropdown.
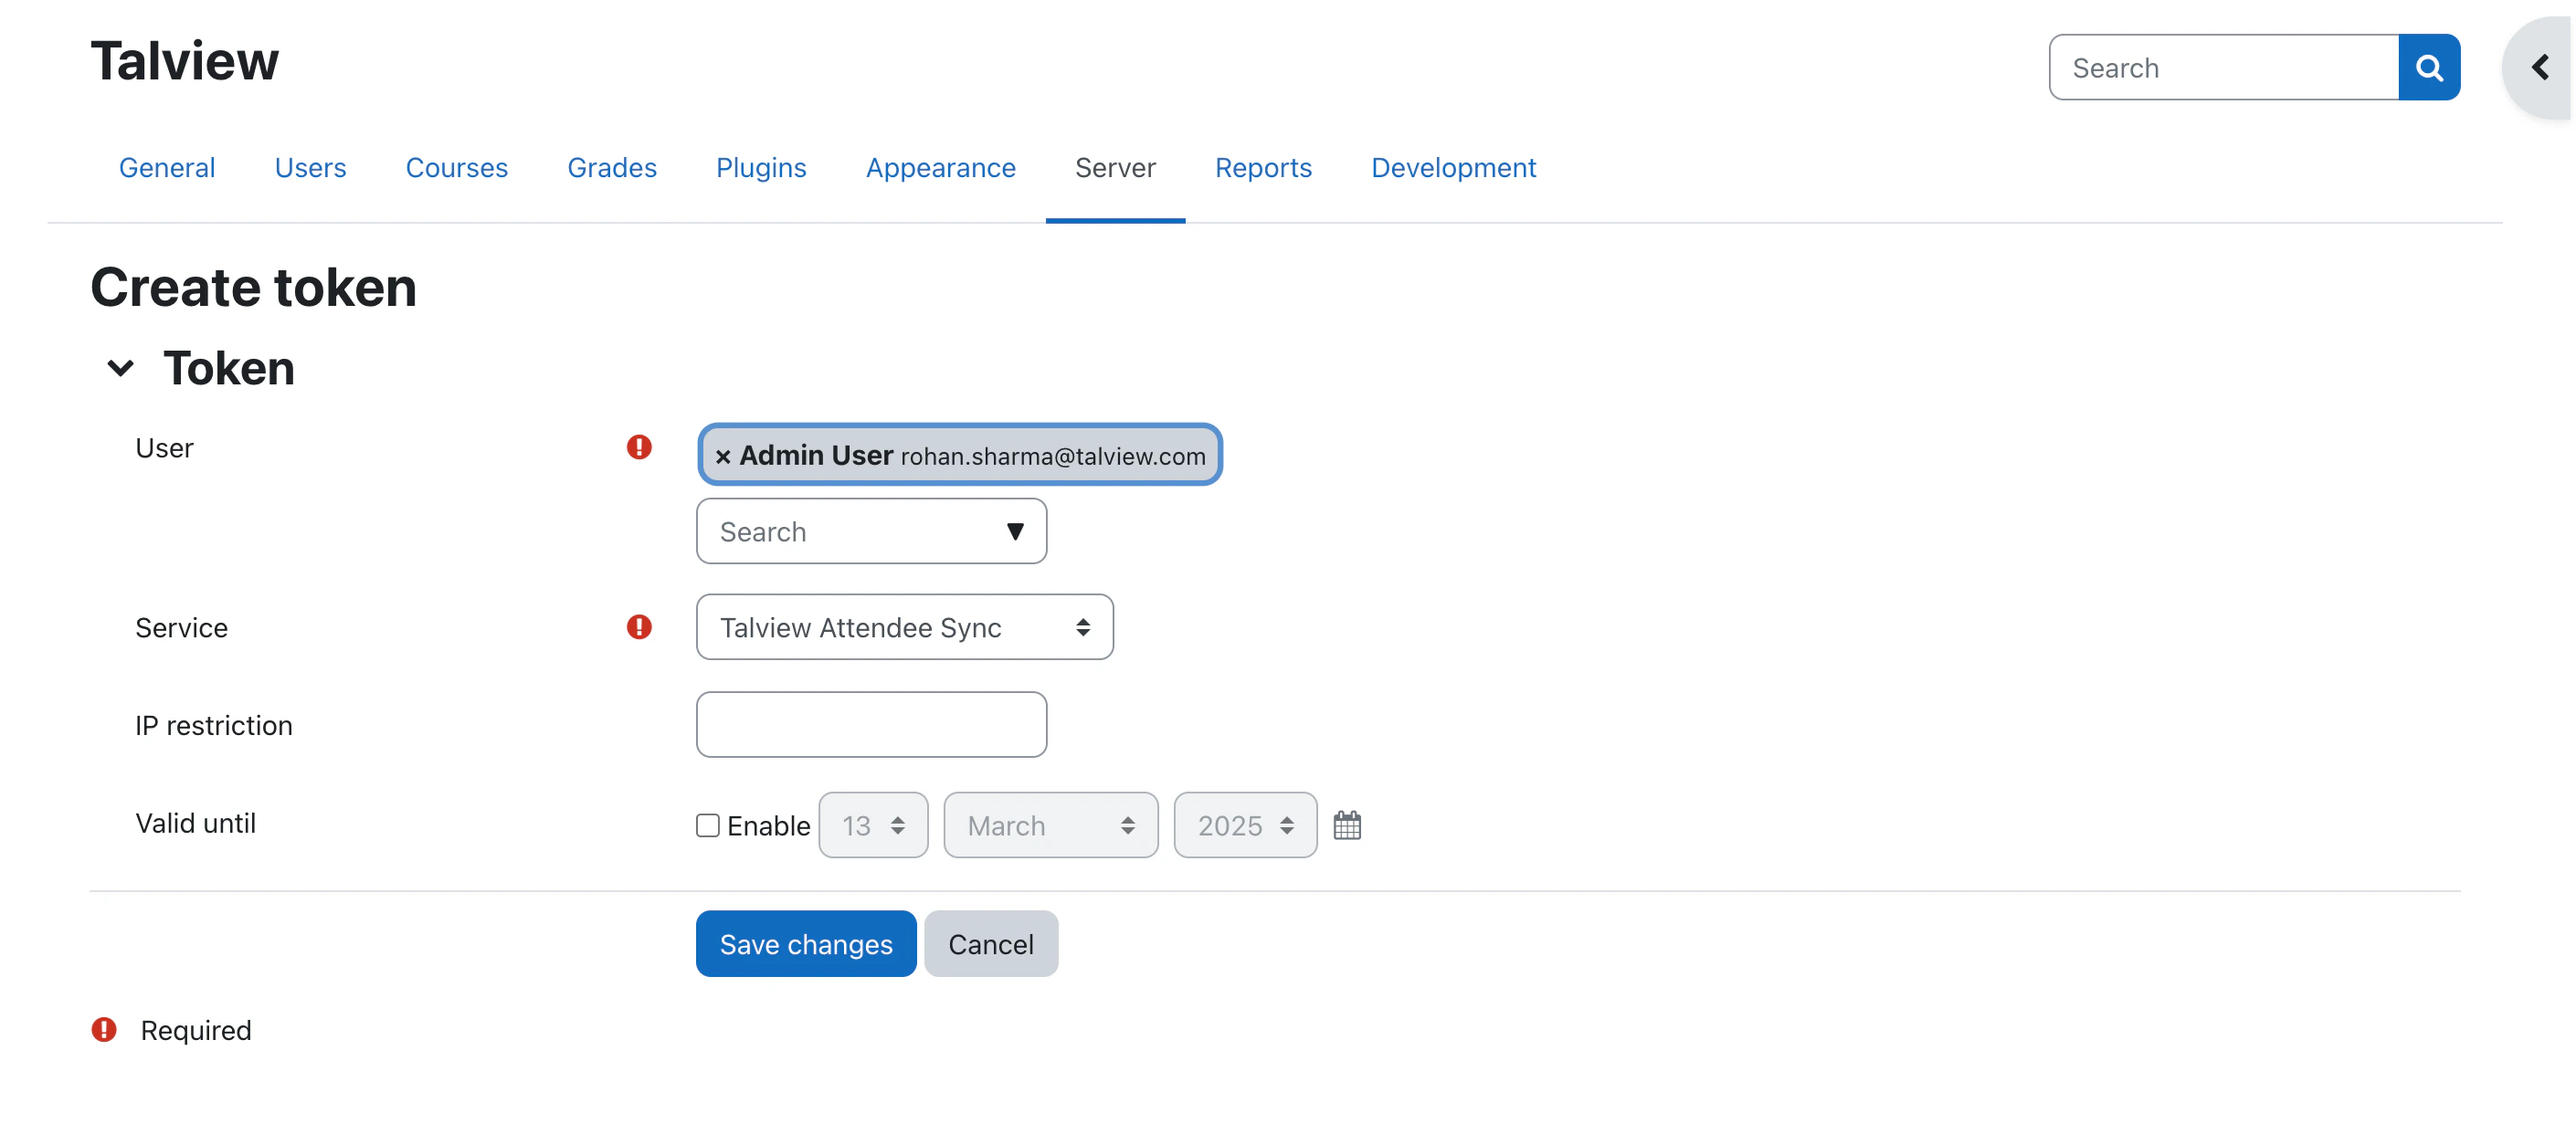
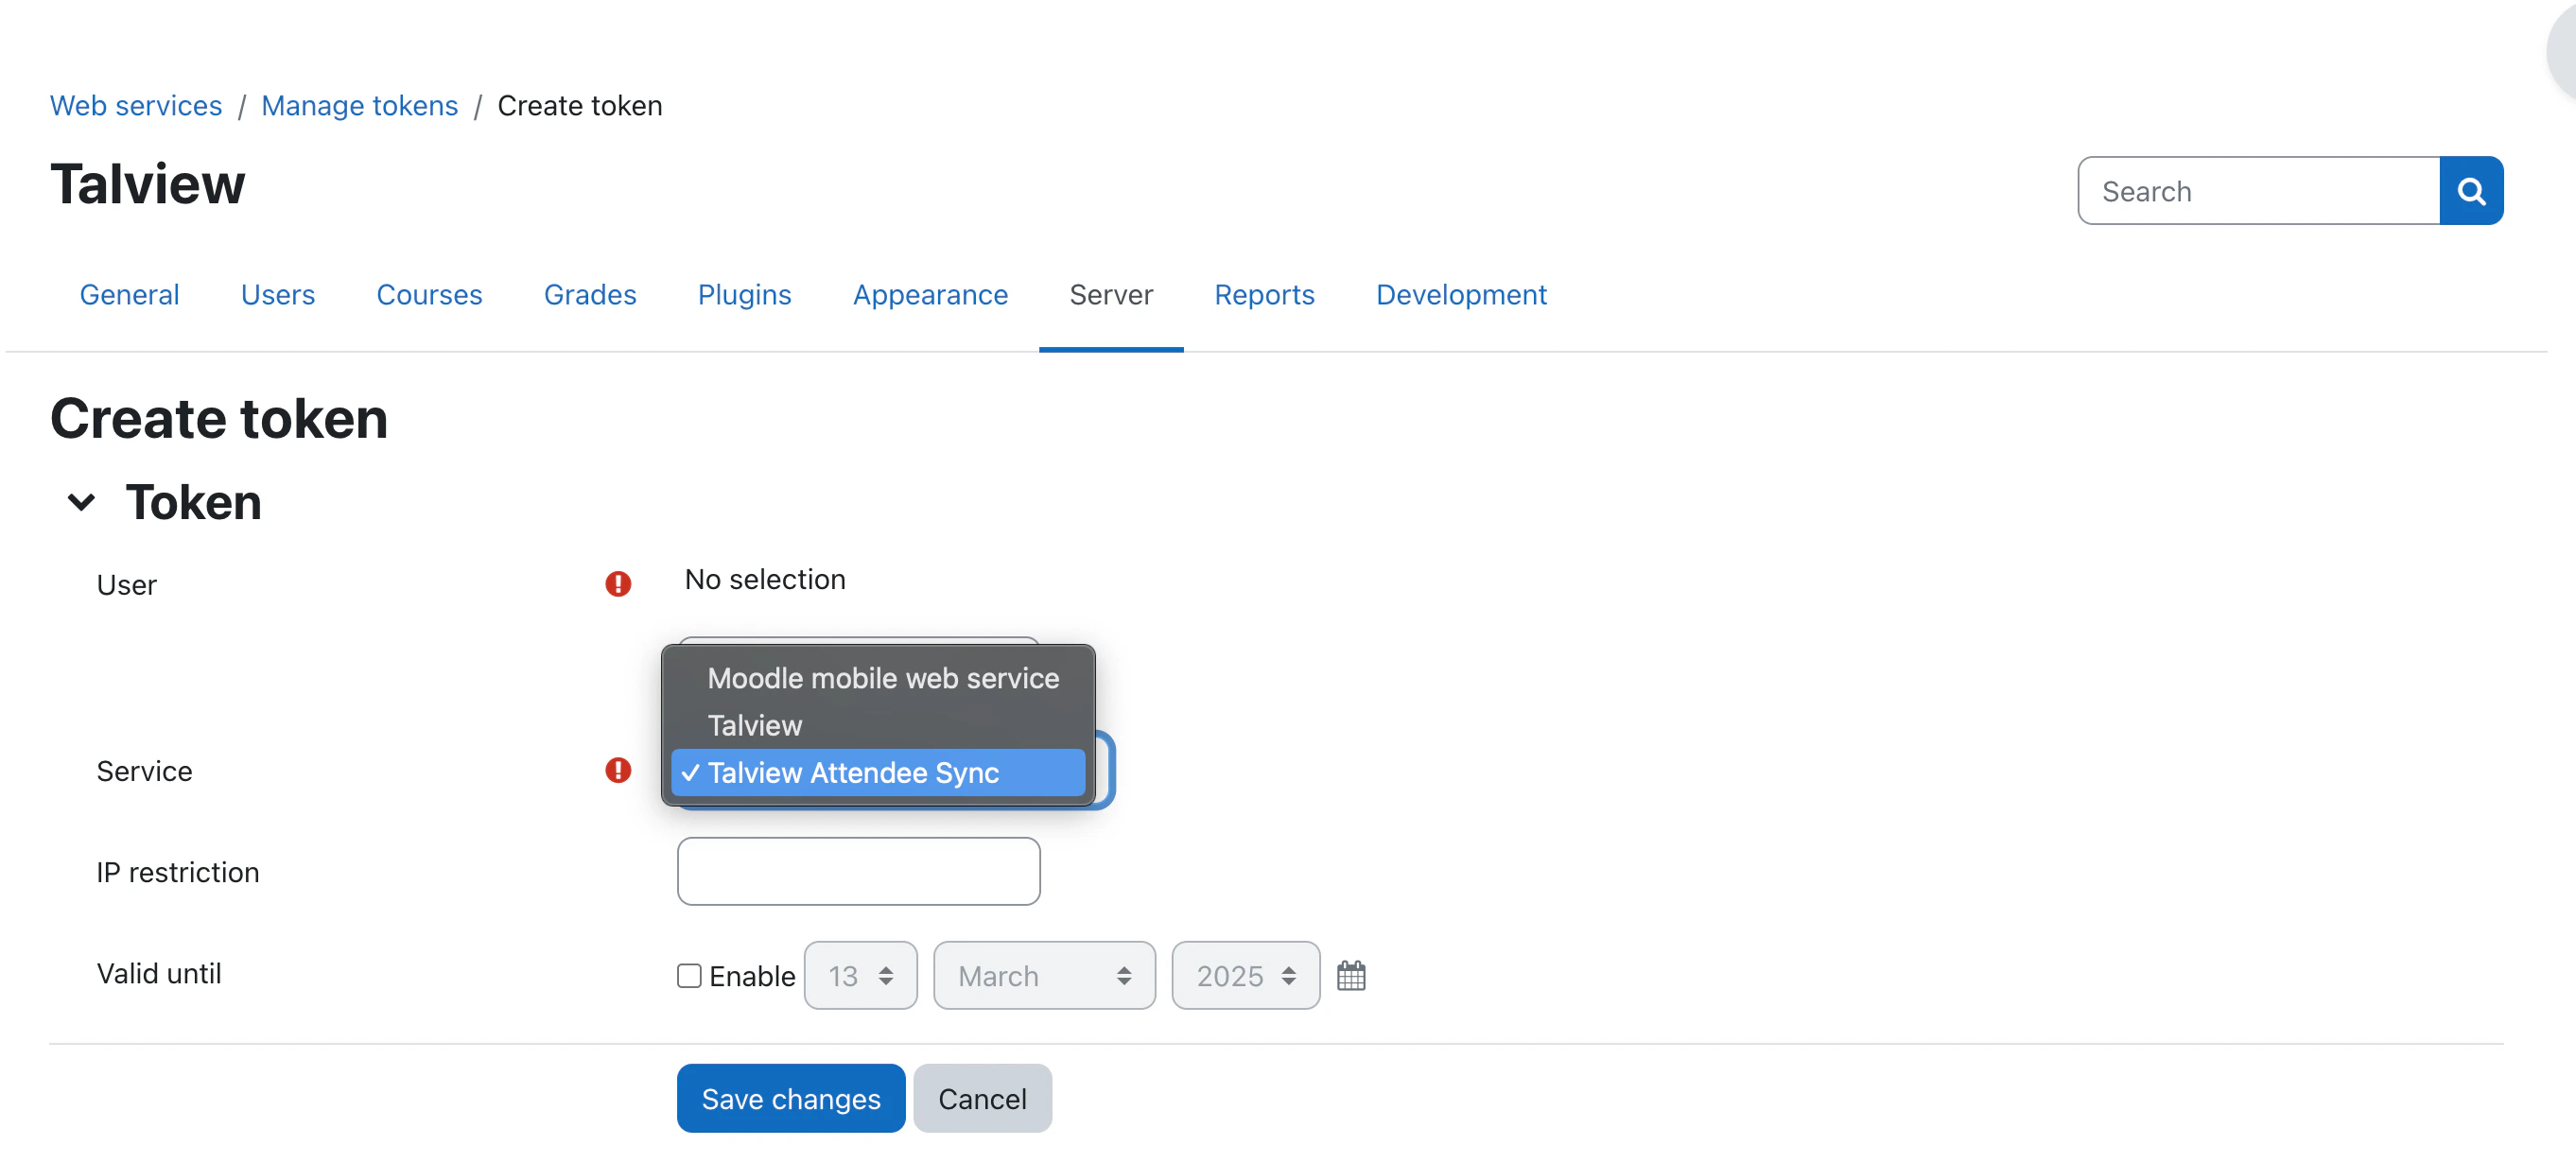 * Click “Save changes” to obtain token
 ***
## Installation Steps
### Download the plugin
Download the plugin’s zip file from [this URL](https://github.com/talview/moodle-quizaccess_v7_proview/releases/tag/v0.1.6).
Save the zip file to a known location on your system.
### Log in to Moodle and navigate to plugin installation
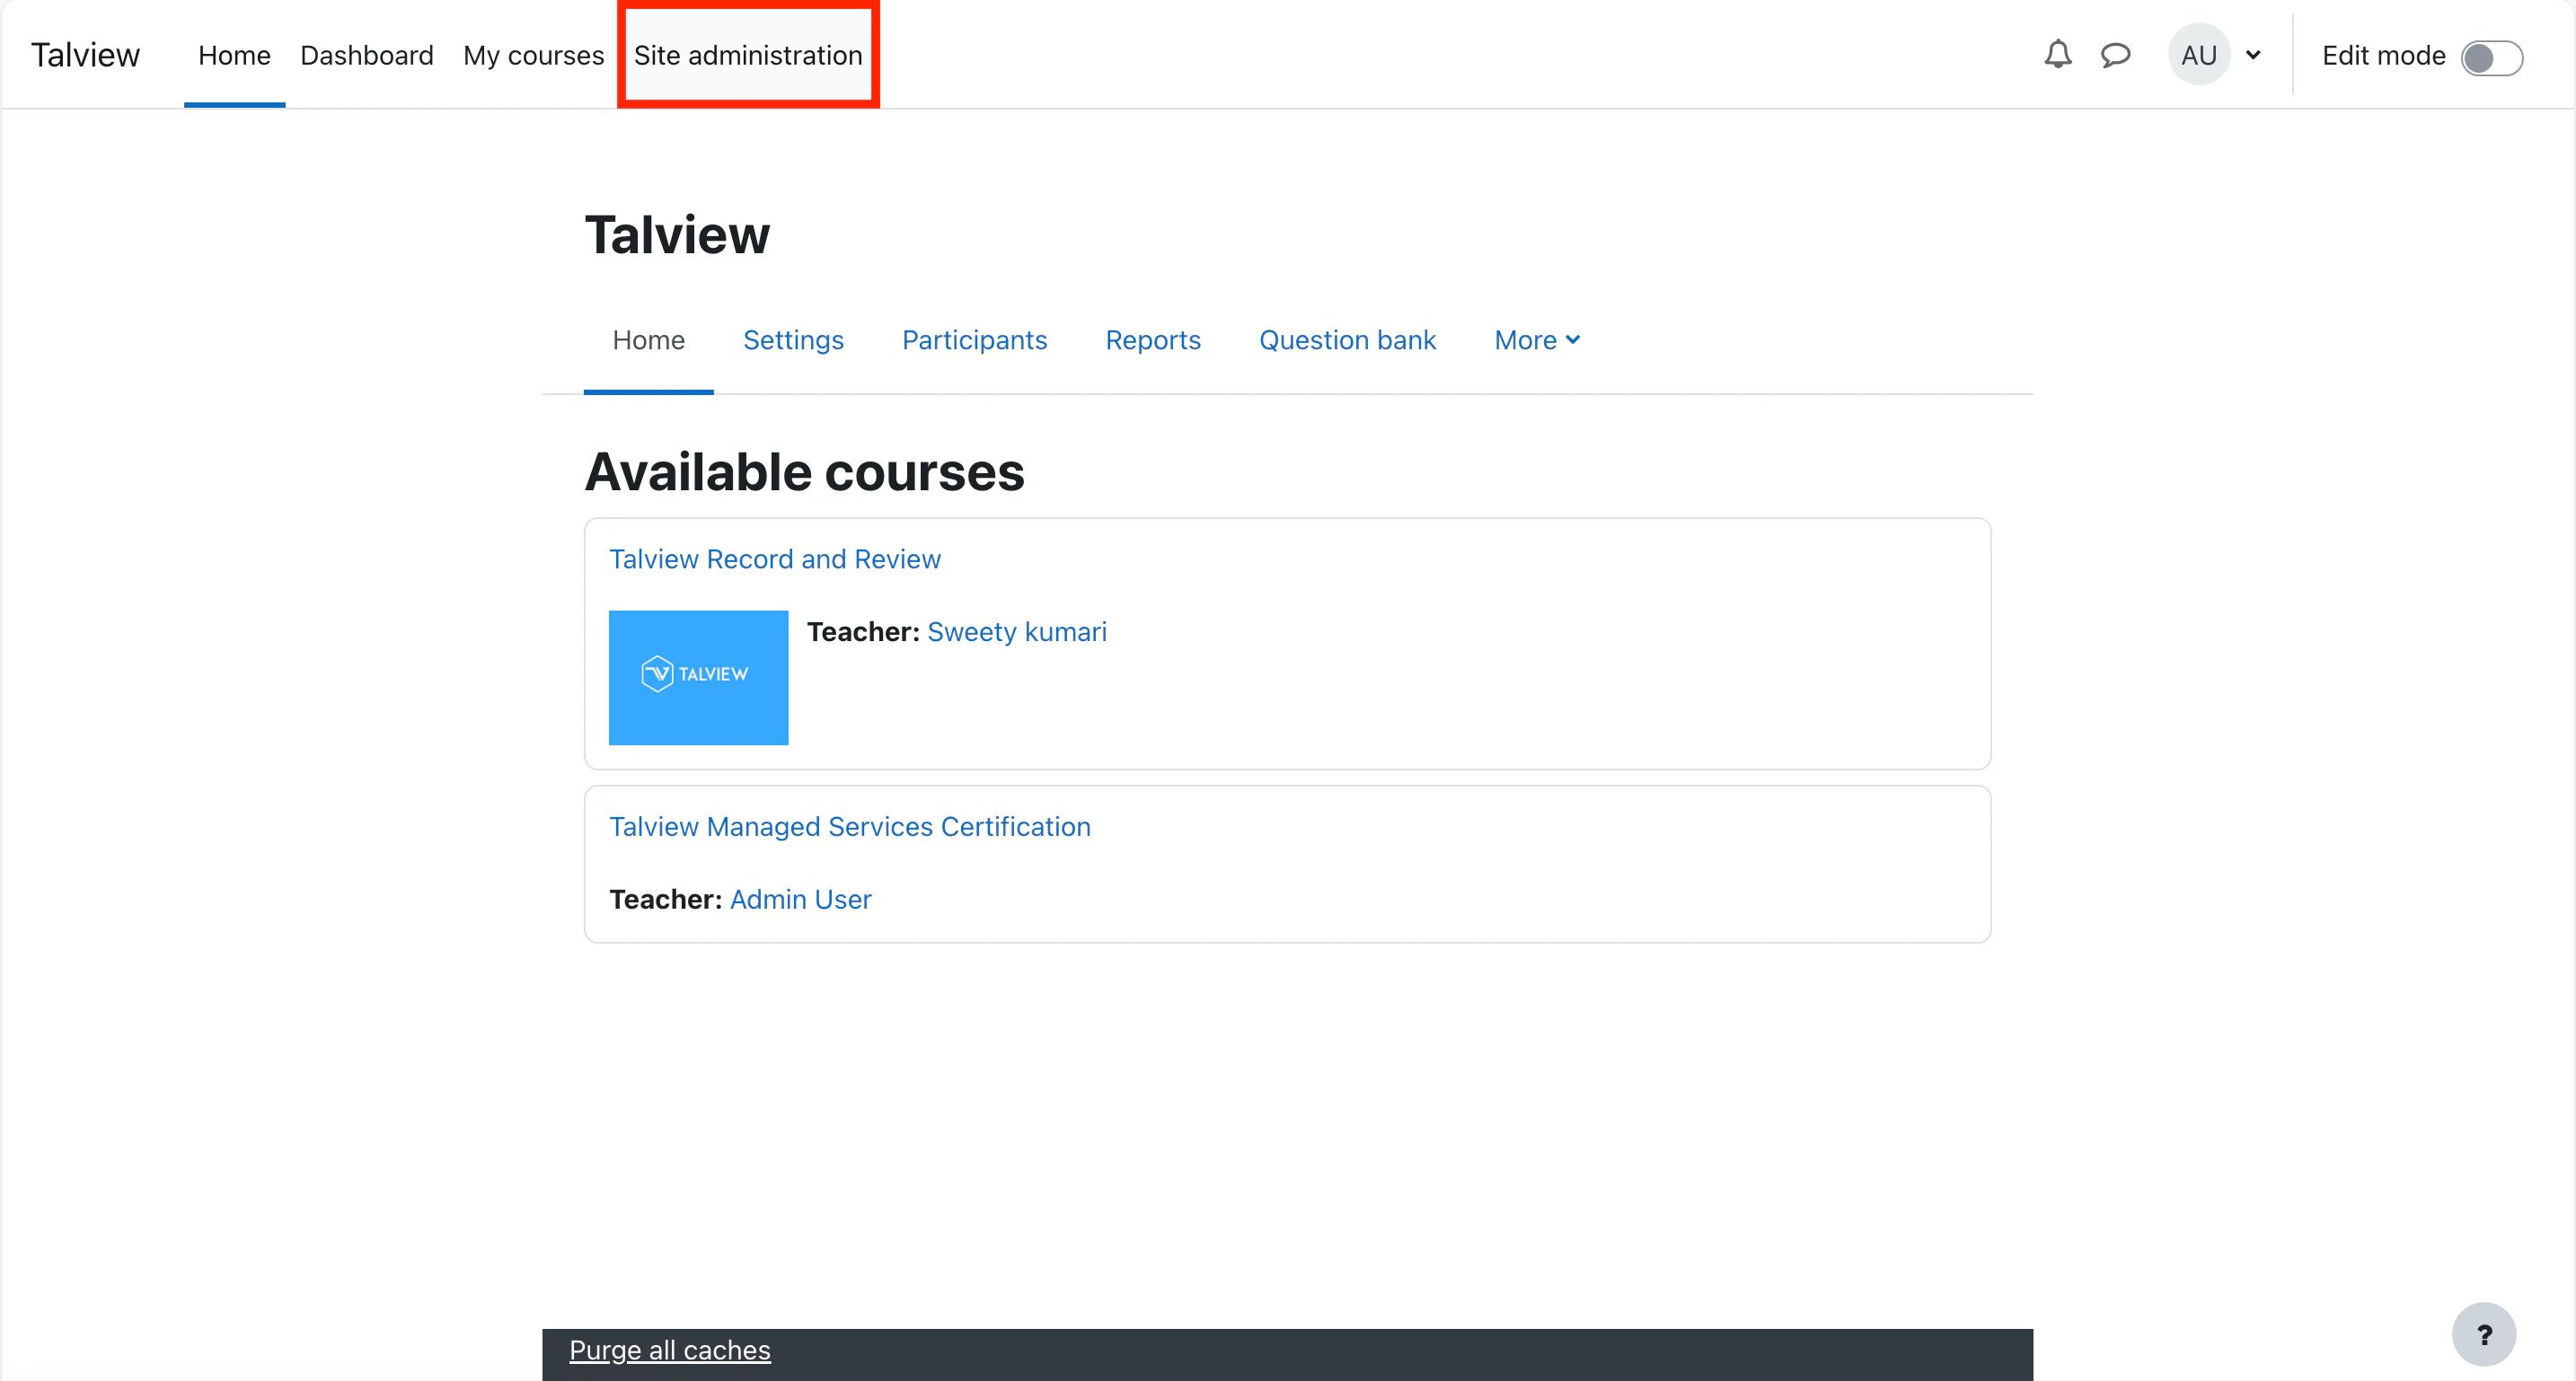
1. Log in to Moodle LMS using your administrator credentials.
2. Click on **Site Administration** in the navigation menu.
***
## Installation Steps
### Download the plugin
Download the plugin’s zip file from [this URL](https://github.com/talview/moodle-quizaccess_v7_proview/releases/tag/v0.1.6).
Save the zip file to a known location on your system.
### Log in to Moodle and navigate to plugin installation
1. Log in to Moodle LMS using your administrator credentials.
2. Click on **Site Administration** in the navigation menu.
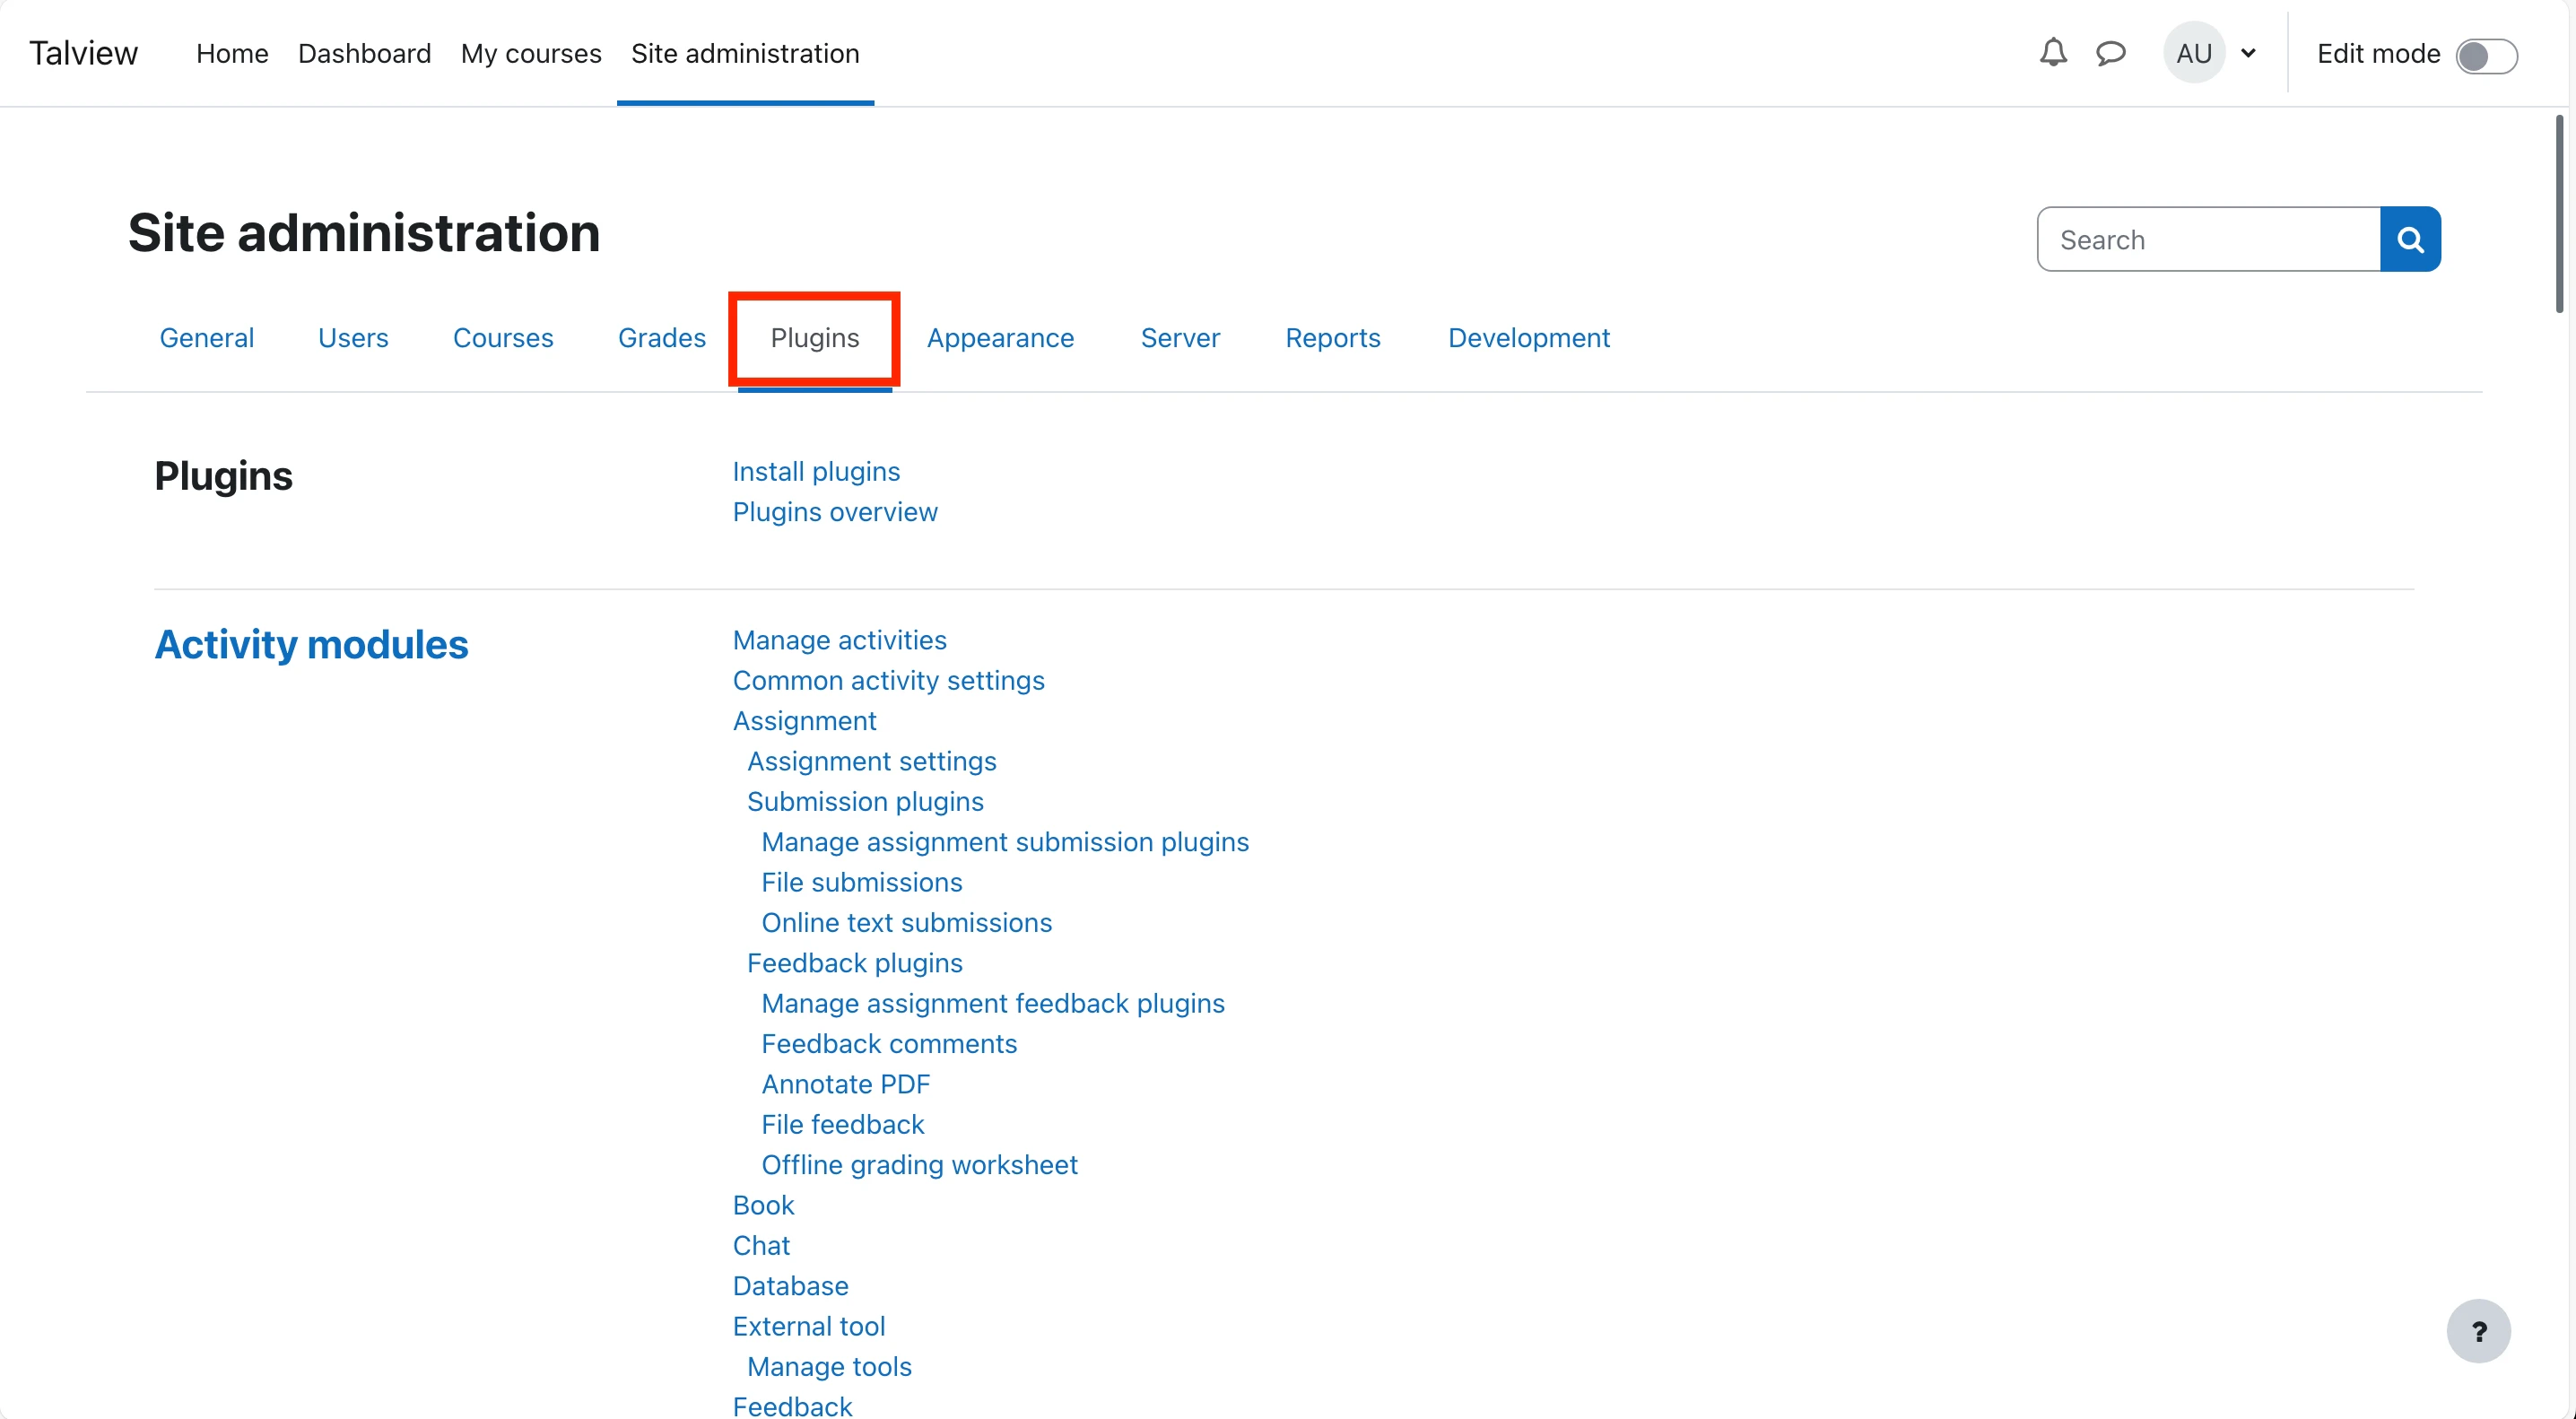
 3. Click on the **Plugins** tab.
4. Click on **Install Plugins**.
3. Click on the **Plugins** tab.
4. Click on **Install Plugins**.
 ***
### Upload and install the plugin
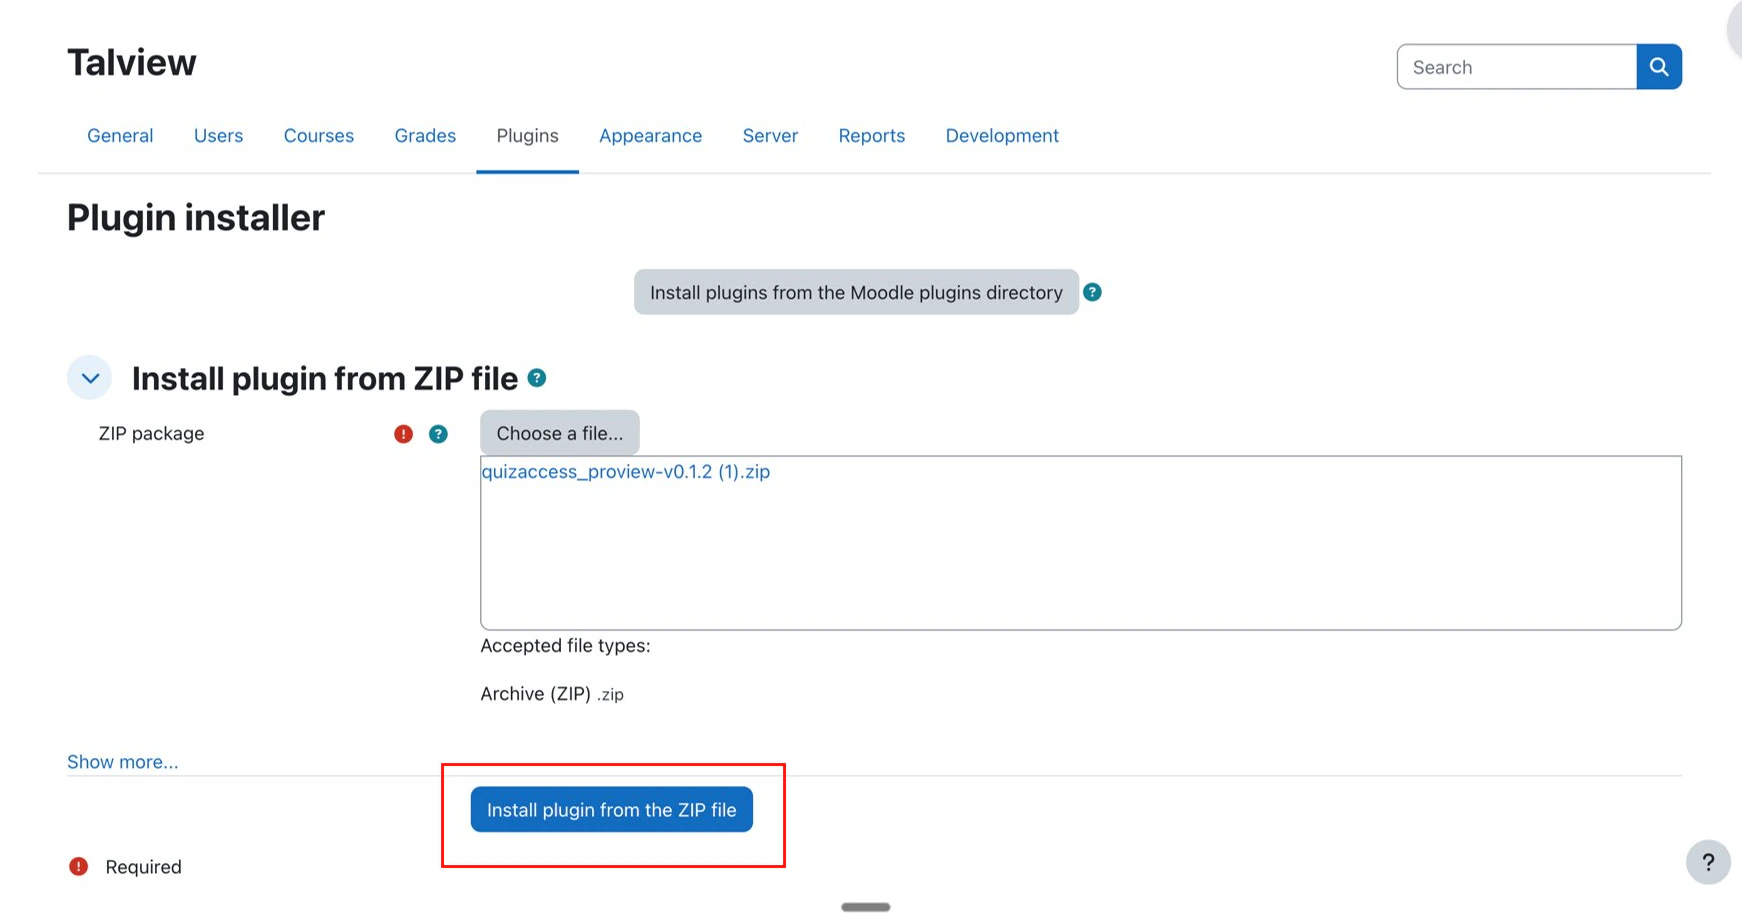
1. In the **Install Plugin from ZIP File** section, either:
* Use the **File Picker** to browse and select the downloaded zip file from your system, or
* Drag and drop the zip file directly into the file picker area.
2. Click **Install Plugin from ZIP File** to proceed.
***
### Upload and install the plugin
1. In the **Install Plugin from ZIP File** section, either:
* Use the **File Picker** to browse and select the downloaded zip file from your system, or
* Drag and drop the zip file directly into the file picker area.
2. Click **Install Plugin from ZIP File** to proceed.
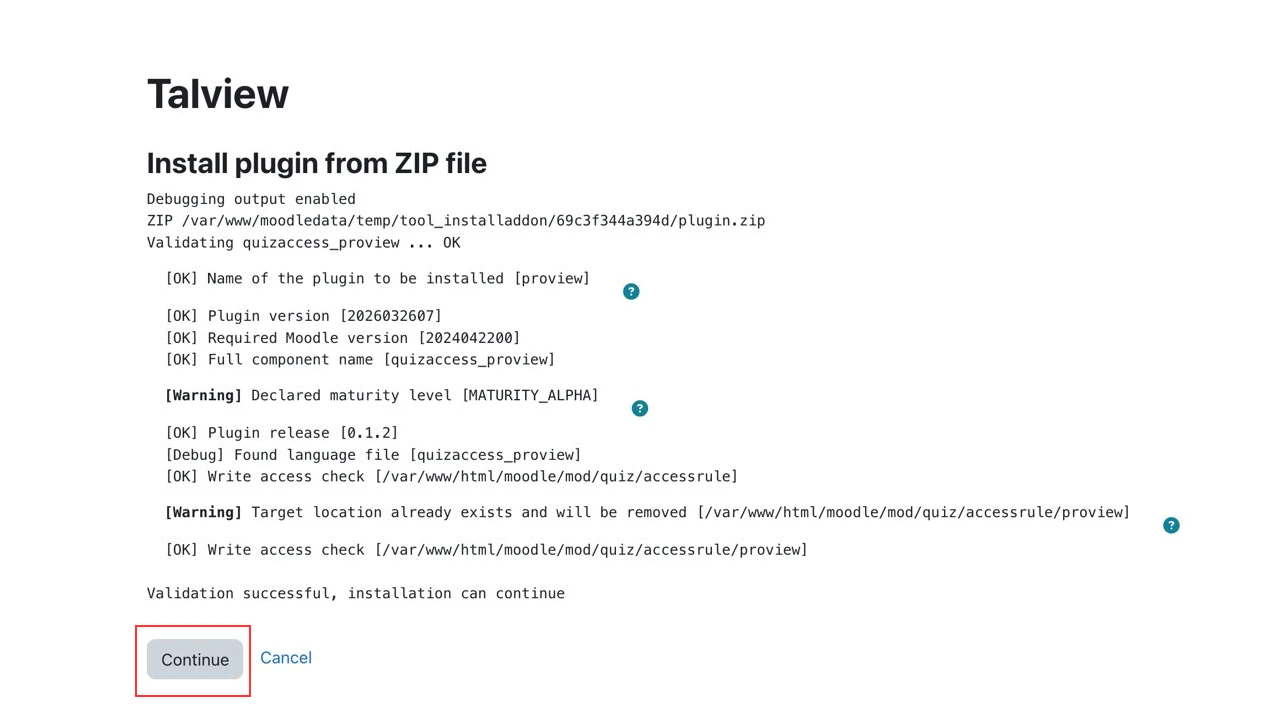
 3. Click **Continue** to complete the installation.
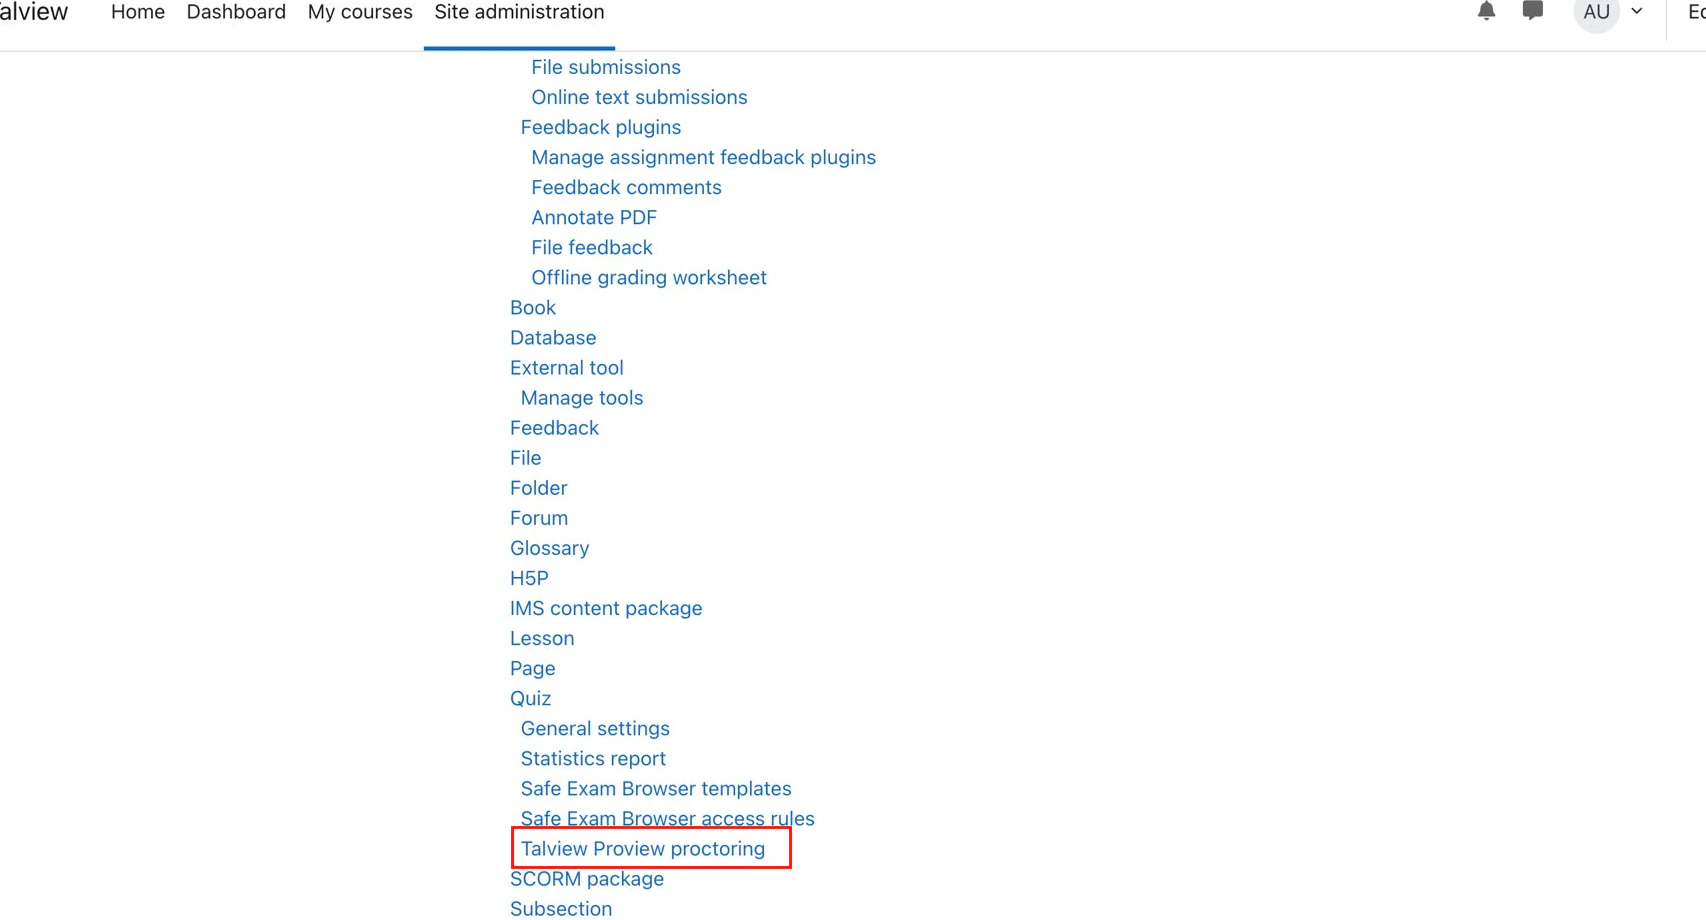
 ### Configure Proview proctoring settings
1. From the **Plugins** page, click on **Talview Proview Proctoring**.
### Configure Proview proctoring settings
1. From the **Plugins** page, click on **Talview Proview Proctoring**.
 2. On the settings page, fill in the following fields:
| Field | Value |
| :--------------------------- | :---------------------------------------------- |
| **CDN URL (Europe)** | `https://cdn.proview.io/client/init.js` |
| **CDN URL (Australia)** | `https://cdn-proview.talview.nz/client/init.js` |
| **Account Name** | Your organization's Proview account name |
| **Admin URL (Europe)** | `https://console.eu.proview.io/embedded` |
| **Admin URL (Australia)** | `https://console.au.proview.io/embedded` |
| **Admin Username** | Provided by Talview |
| **Admin Password** | Provided by Talview |
| **Root Directory** | Your organisation's configured root directory |
| **Callback URL (Europe)** | `https://lms-connector.proview.io` |
| **Callback URL (Australia)** | `https://lms-connector.talview.nz` |
> **Note:** Use only the CDN URL and Callback URL applicable to your region.
2. On the settings page, fill in the following fields:
| Field | Value |
| :--------------------------- | :---------------------------------------------- |
| **CDN URL (Europe)** | `https://cdn.proview.io/client/init.js` |
| **CDN URL (Australia)** | `https://cdn-proview.talview.nz/client/init.js` |
| **Account Name** | Your organization's Proview account name |
| **Admin URL (Europe)** | `https://console.eu.proview.io/embedded` |
| **Admin URL (Australia)** | `https://console.au.proview.io/embedded` |
| **Admin Username** | Provided by Talview |
| **Admin Password** | Provided by Talview |
| **Root Directory** | Your organisation's configured root directory |
| **Callback URL (Europe)** | `https://lms-connector.proview.io` |
| **Callback URL (Australia)** | `https://lms-connector.talview.nz` |
> **Note:** Use only the CDN URL and Callback URL applicable to your region.
 Once all fields are filled in, click **Save Changes**.
The Proview proctoring plugin is now installed and configured on your Moodle 4.5 LMS instance. Subject coordinators can now begin configuring proctoring for their quizzes.
***
## Assumptions
Before proceeding with the installation of Talview's proctoring plugins for Moodle LMS, we assume the following:
1. **Active Moodle Environment**: You have access to your Moodle platform with administrator rights. Talview Plugin is currently supported only on Moodle versions 4.0, 4.1, 4.2, 4.5
2. **Talview Subscription**: You have a valid subscription to Talview Proview services. If needed, contact the [Talview Sales Team](https://www.talview.com/contact?hsCtaTracking=6b06eef3-21df-4508-826e-0c77f9922d17%7Cede73d3b-fccd-45f2-abfa-73d38e575dec) or [Talview Tech Support](https://talview.freshdesk.com/en/support/home).
3. **Compatible Browser**: Testers will use a compatible web browser for the proctored quizzes.
Ensure your server and Moodle environment meet the necessary technical requirements for the plugins. Talview utilizes recorded alerts and configured stake to compute the Proview index, based on the candidate's behavior involving their browser, camera, and microphone. For comprehensive information on Talview's Proview flags, please consult the [Proctoring v7-Plus Events/Flags Details](https://www.notion.so/Proctoring-v7-Plus-Events-Flags-Details-6fc4b8a03d774654a95b66f76f02a3f9?pvs=21) documentation.
Once all fields are filled in, click **Save Changes**.
The Proview proctoring plugin is now installed and configured on your Moodle 4.5 LMS instance. Subject coordinators can now begin configuring proctoring for their quizzes.
***
## Assumptions
Before proceeding with the installation of Talview's proctoring plugins for Moodle LMS, we assume the following:
1. **Active Moodle Environment**: You have access to your Moodle platform with administrator rights. Talview Plugin is currently supported only on Moodle versions 4.0, 4.1, 4.2, 4.5
2. **Talview Subscription**: You have a valid subscription to Talview Proview services. If needed, contact the [Talview Sales Team](https://www.talview.com/contact?hsCtaTracking=6b06eef3-21df-4508-826e-0c77f9922d17%7Cede73d3b-fccd-45f2-abfa-73d38e575dec) or [Talview Tech Support](https://talview.freshdesk.com/en/support/home).
3. **Compatible Browser**: Testers will use a compatible web browser for the proctored quizzes.
Ensure your server and Moodle environment meet the necessary technical requirements for the plugins. Talview utilizes recorded alerts and configured stake to compute the Proview index, based on the candidate's behavior involving their browser, camera, and microphone. For comprehensive information on Talview's Proview flags, please consult the [Proctoring v7-Plus Events/Flags Details](https://www.notion.so/Proctoring-v7-Plus-Events-Flags-Details-6fc4b8a03d774654a95b66f76f02a3f9?pvs=21) documentation.