> ## Documentation Index
> Fetch the complete documentation index at: https://docs.talview.com/llms.txt
> Use this file to discover all available pages before exploring further.
# Blackboard Ultra - Installation Guide
> Talview provides LTI1.3 for integration with Blackboard. Follow these steps to install and configure the LTI Tool.
## **Introduction**
The Proview plugin, developed by Talview Inc., integrates the "Proview" proctoring solution into Blackboard Ultra LMS. Proview LTI Tool is designed to deliver a secure, seamless, and efficient proctoring experience directly through your web browser. This tool provides robust exam integrity measures and unparalleled convenience, setting a new standard in online proctoring. This tool continuously evolves with frequent feature enhancements.
This user guide will help system administrators add Proview LTI tool Blackboard Ultra LMS.
## Capabilities
* **Seamless and User-Friendly Integration**: Proview integrates effortlessly with Blackboard Ultra(LMS), ensuring a smooth setup process. The tool is easy to install and use, eliminating the need for complex software installations and making it accessible to a wide range of users.
* **Versatile and Flexible**: Proview is compatible with major web browsers, providing a consistent user experience across different devices and operating systems.
* **Live Remote Proctoring :** Live Remote Proctoring offers an end-to-end platform that supports holding multiple low to high-stakes online exams concurrently monitored by live proctors. The proctors help in authenticating test takers, monitoring exams, intervening, raising flags, terminating exams, and more.
* **Automated Proctoring:** Through advanced video & audio analytics, the Proview system monitors the feeds for any suspicious activity. It ensures candidate focuses on test screen during the test and checks for suspicious objects in video and background voice activity to red flag the test.
* **Record & Review:** This fully automated, AI-enabled application authenticates test takers, tracks, and records their behaviors, and flags critical events. After the exam concludes, our highly trained proctors, or those provided by you, can quickly review and confirm any event flags before certifying the validity of the exam and authenticity of test takers.
## Supported Browsers and Operating Systems
**Note:** Ensure to keep your browser and OS updated to one of these supported versions to prevent any potential issues during proctoring sessions.
Proview Proctoring solutions are supported on the following browsers:
* [Google Chrome](https://www.google.com/chrome/?brand=OPNX\&ds_kid=43700053265395784\&gclid=efe458afb020140252e33e0704417f10\&gclsrc=3p.ds&\&msclkid=efe458afb020140252e33e0704417f10\&utm_source=bing\&utm_medium=cpc\&utm_campaign=1707332%20%7C%20Chrome%20Win11%20%7C%20DR%20%7C%20ESS01%20%7C%20APAC%20%7C%20IN%20%7C%20en%20%7C%20Desk%20%7C%20SEM%20%7C%20BKWS%20-%20EXA%20%7C%20Txt%20%7C%20Bing\&utm_term=install%20chrome\&utm_content=Desk%20%7C%20BKWS%20-%20EXA%20%7C%20Txt_Install\&gclid=efe458afb020140252e33e0704417f10\&gclsrc=3p.ds) (latest 3 versions only)
* [Microsoft Edge](https://www.microsoft.com/en-us/edge/download?form=MA13FJ) (latest 3 versions only)
* [Mozilla Firefox](https://www.mozilla.org/en-US/firefox/new/) (latest 3 versions only)
Proview Proctoring solutions are supported on the following operating systems:
* **Windows Devices**: Windows 10 and Windows 11
* **Apple Devices**: macOS Sonoma
## Pre-requisites
* Client Blackboard instance is of type “Blackboard Ultra”.
* Users who perform configuration require admin tool access.
## Steps
### **1. Access admin tools**
* Log in to your LMS instance with a user having “System Administrator” Role.
* Select Admin from left side panel.
 ### **2. Add Proview LTI Tool Provider**
* In the administrator panel select “Integrations → LTI Tool Providers → Register LTI1.3/Advantage Tool”
### **2. Add Proview LTI Tool Provider**
* In the administrator panel select “Integrations → LTI Tool Providers → Register LTI1.3/Advantage Tool”

 * Add the client-id provided by Talview (`fe404e30-2b49-4155-aa08-02db995a2333` for development environment) and click “Submit to proceed”.
 * Copy the default deployment ID and share it with Talview to complete the configuration.
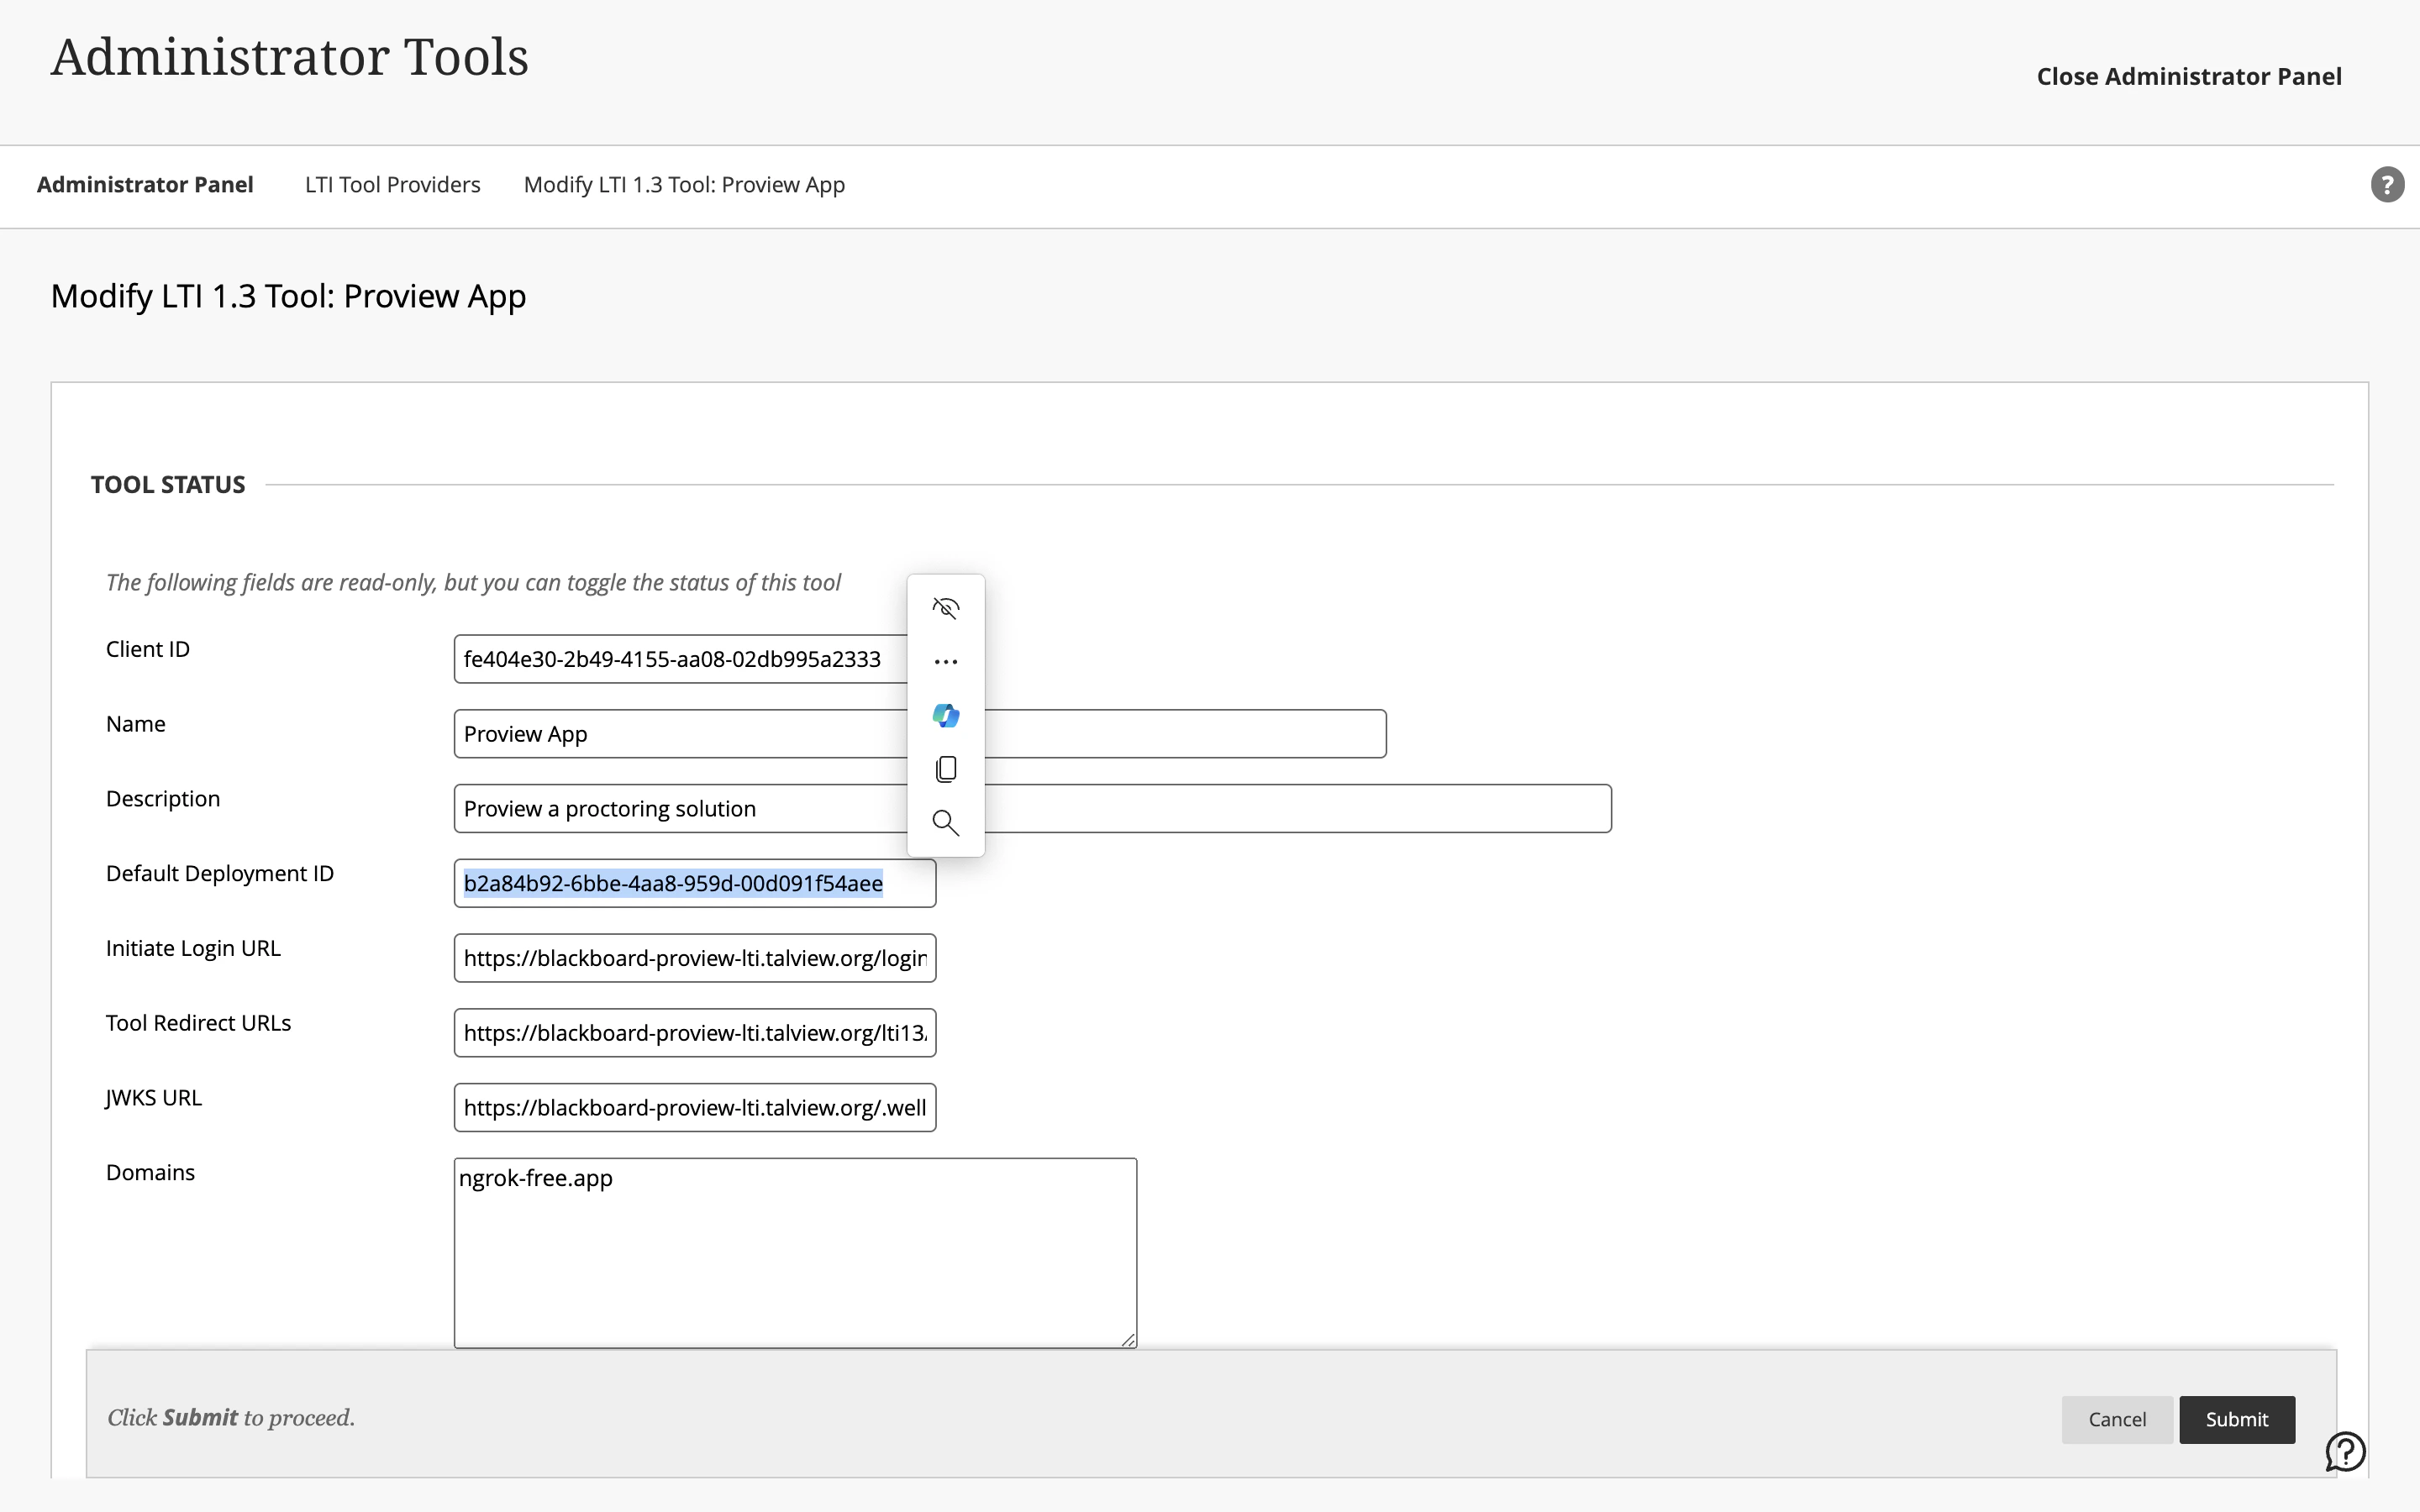 * Change the “Tool Status” to “Approved” for enabling the tool, also grant the tool user data access.
 ### **3. Add Proview REST API Integration**
* In the administrator panel select “Integrations → REST API Integrations → Create Integration”
### **3. Add Proview REST API Integration**
* In the administrator panel select “Integrations → REST API Integrations → Create Integration”

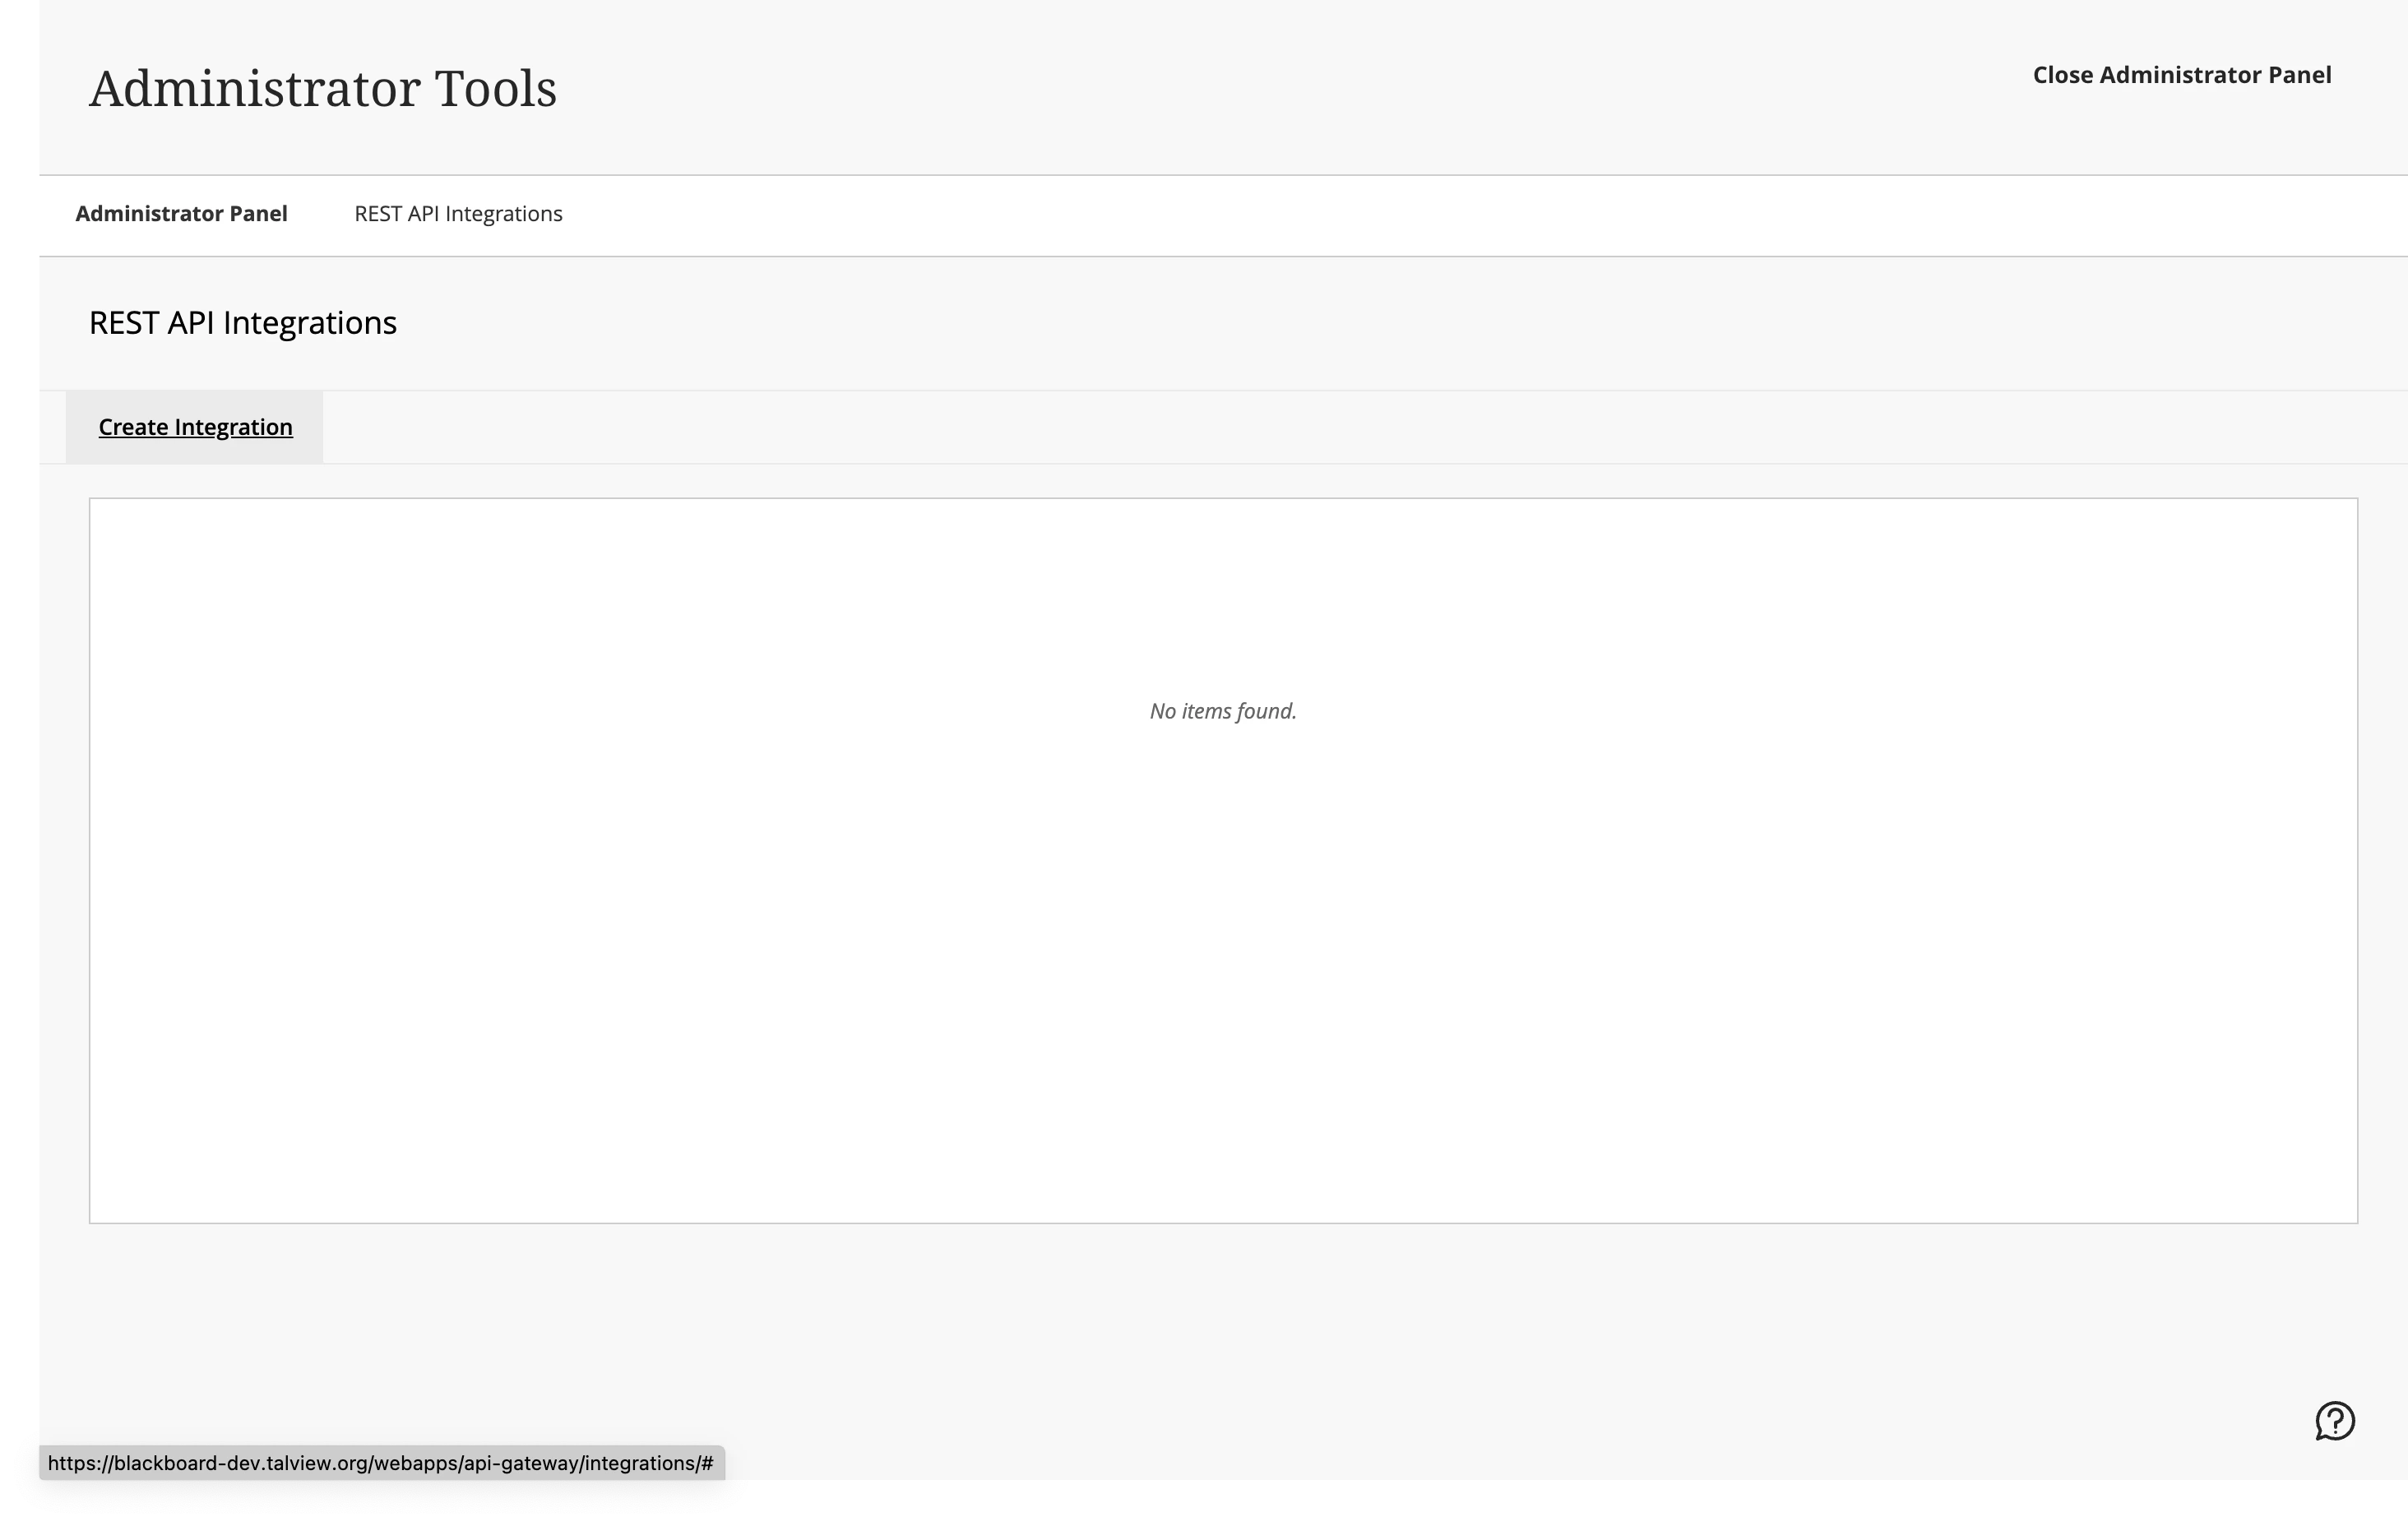 * Add the “Application ID” provided by Talview (`fe404e30-2b49-4155-aa08-02db995a2333` for development environment).
* Add a user as Learn User (You can create a new Integration User if Required).
* Allow End User Access
* Authorise to act as user
* Add the “Application ID” provided by Talview (`fe404e30-2b49-4155-aa08-02db995a2333` for development environment).
* Add a user as Learn User (You can create a new Integration User if Required).
* Allow End User Access
* Authorise to act as user
 ## Limitations
1. This LTI Tool is only supported on Blackboard Ultra and **not** supported on Blackboard Original.
2. If the tool is removed from the LTI Tool Providers list and re-added, the deployment ID will change and will have to be re-shared with Talview.
## Limitations
1. This LTI Tool is only supported on Blackboard Ultra and **not** supported on Blackboard Original.
2. If the tool is removed from the LTI Tool Providers list and re-added, the deployment ID will change and will have to be re-shared with Talview.